What you’ll learn
This article is part of the Camper Van Conversion series, covering body alterations: installing windows, ceiling fans, swivel seats, lowering the e-brake (on Ford Transits), and adding additional suspension, roof rack, ladder, and bench seat.
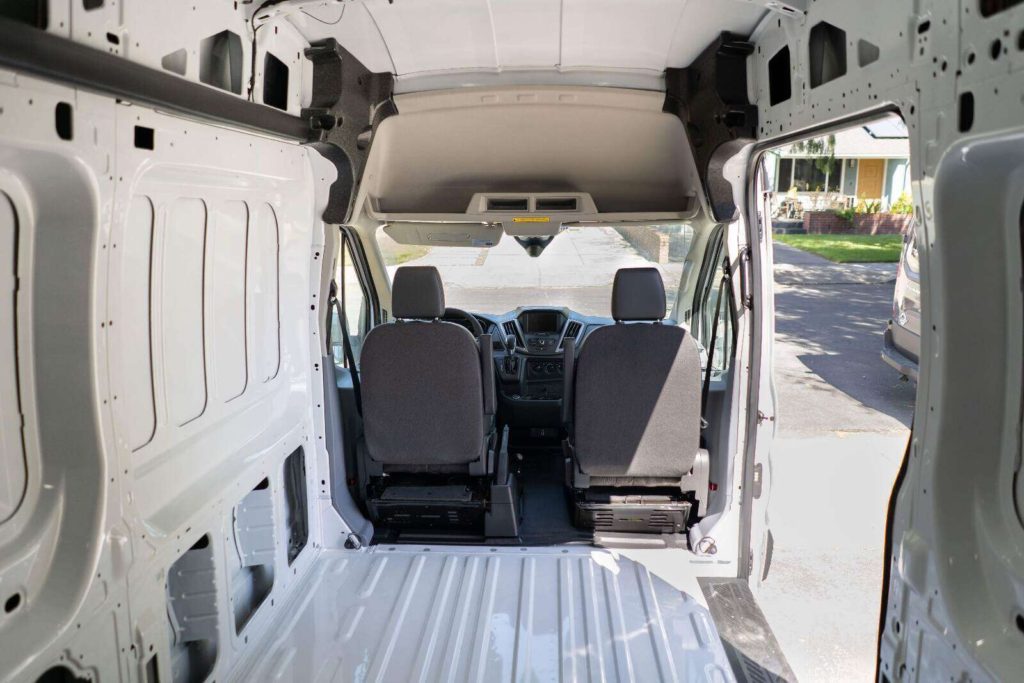
The first thing you’re going to do when you buy a new cargo van is admire the shiny interior and imagine all the possibilities for your new home. In a few minutes you’ll start thinking about the work, then realize the first things you need to do are body modifications, the can’t-redo-holes-in-sheet-metal. Sweat.
This post contains affiliate links. I’ll receive a commission fee if you click on a product link. Your buy price doesn’t change, but the commission I receive from the retailer goes to the maintenance and hosting costs of this website.
RV-style window installation
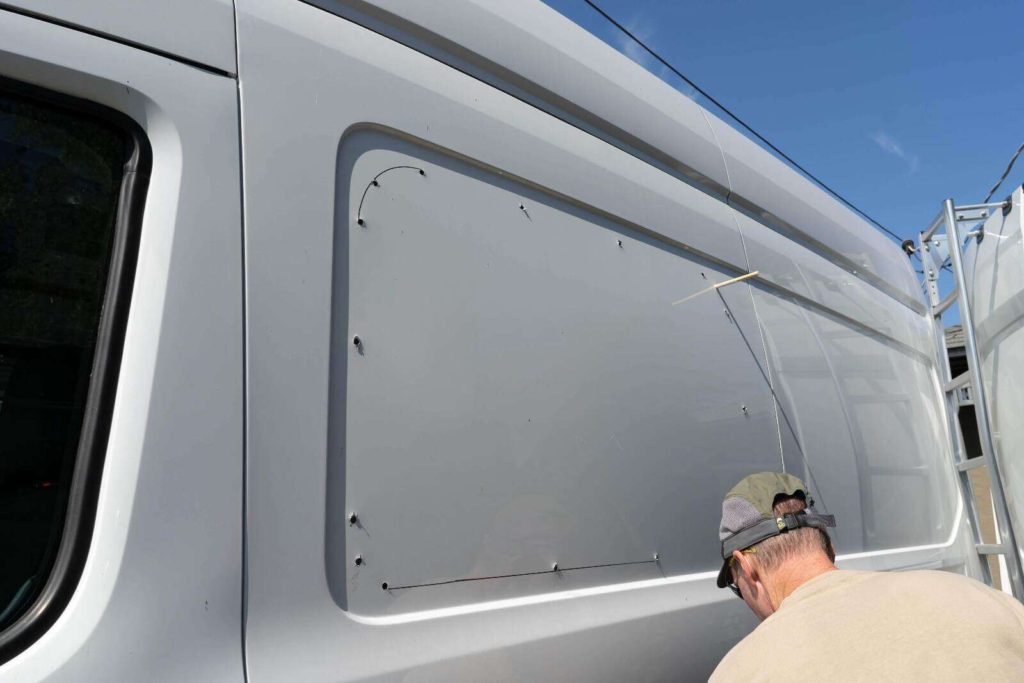
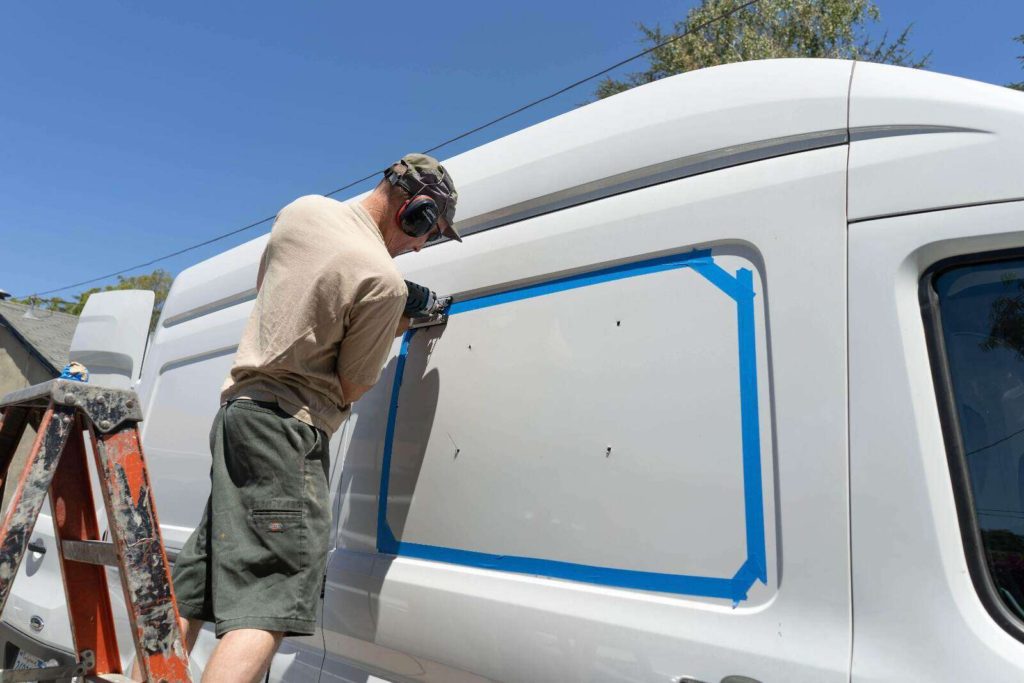
The first step in our camper van conversion was installing windows. We ordered a cargo van, meaning there weren’t any factory-installed windows on the sides, as compared to passenger vans. Because we designed for a bench seat for kid(s), we wanted as many windows as possible. We also wanted RV-style “T” vent windows so they have levered, screened openings, that can be cracked in rain.
We made a deliberate decision to start with the passenger side sliding-door window, since worst case we figured we could order another sliding door if we messed up.
CR Laurence Windows
Unfortunately, it’s about the only choice in full-size windows for Ford and Sprinter. Their quality control isn’t great, and we had to exchange for defects. This dealer was great to work with, though.

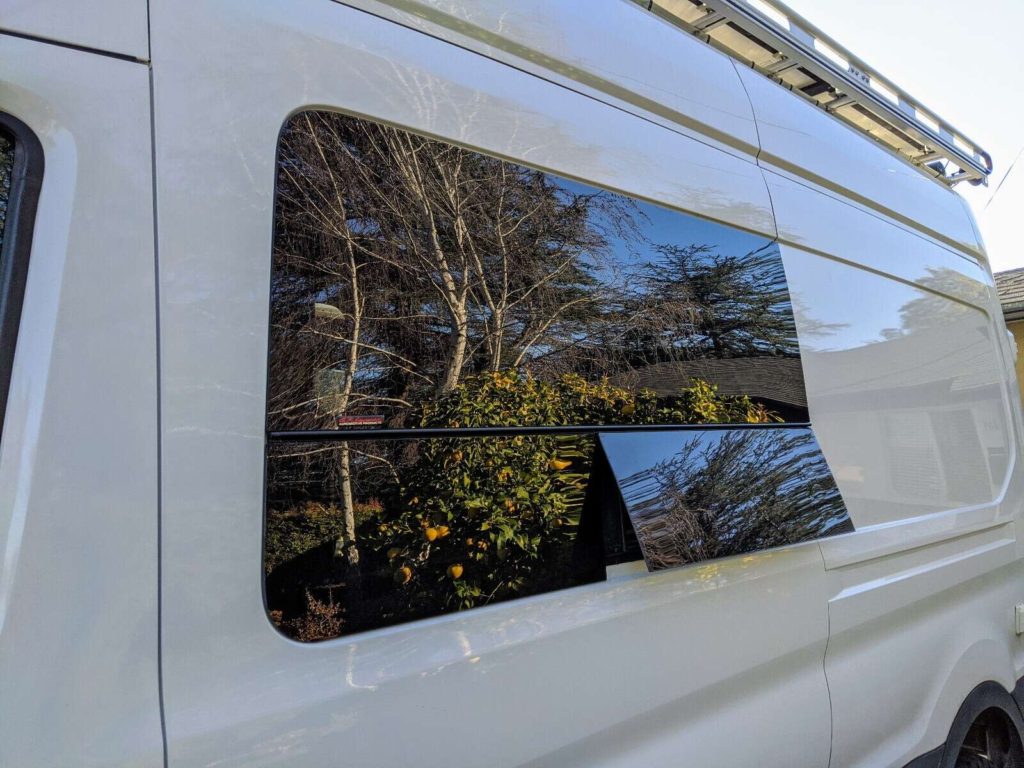
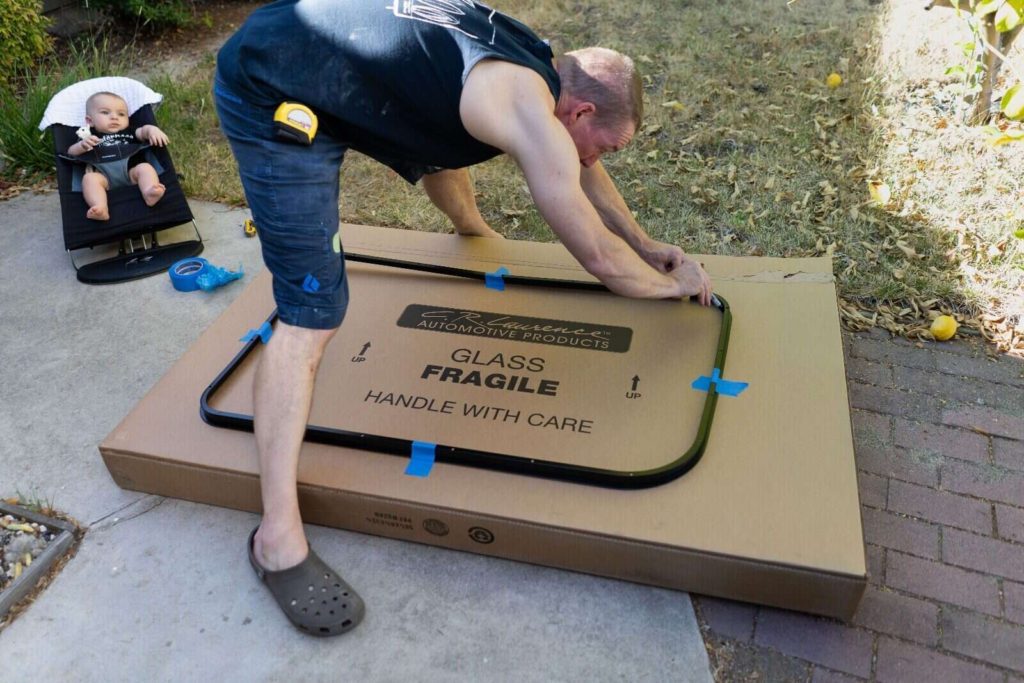
The CR Laurence windows attach via a compression ring, so there’s no adhesive or sealant needed.

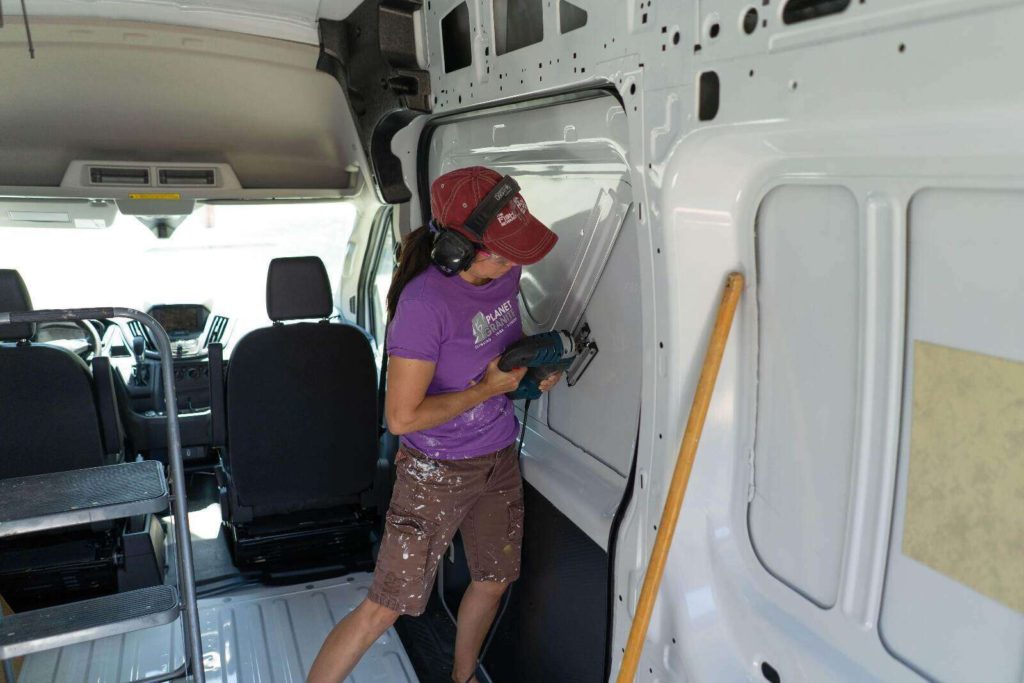

After you’ve filed the metal burrs off, coat with a primer of POR-15. It’s an excellent raw-metal sealant to prevent rust. Get a lot of the 4-oz small size rather than a pint–it seals so well that it’ll quickly become hard to open the can. You’ll use POR-15 for a lot of body work.
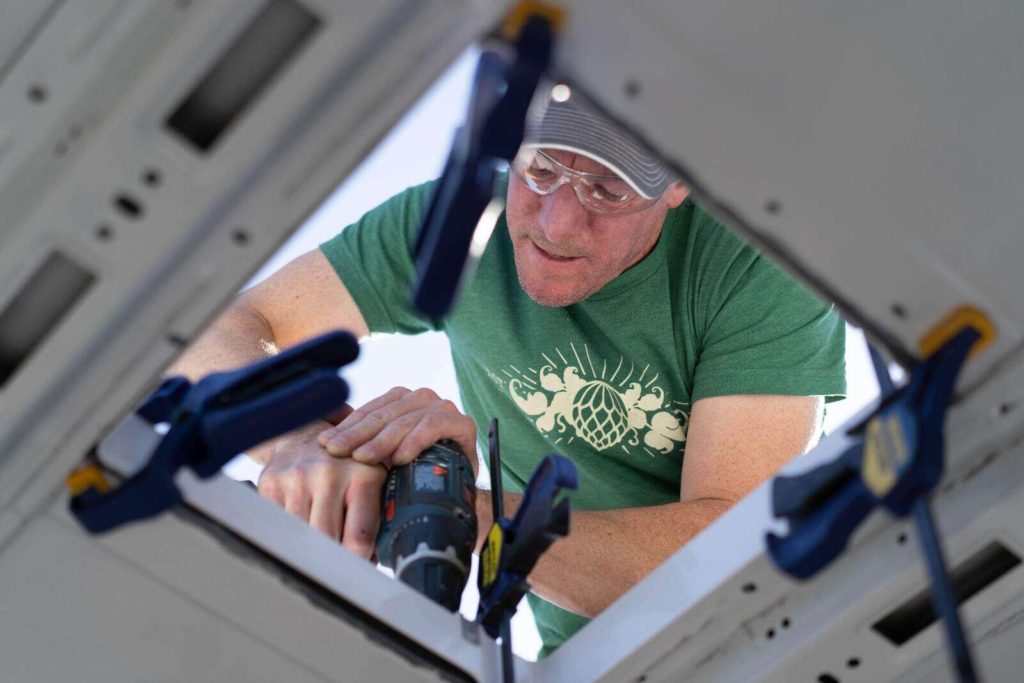
Installing the window is a 2-person job. One person holds the ring on the inside, the other person holds the window on the outside, and the person on the inside starts tightening screws to compress the ring against the window. No photos, since all of our hands were busy for this part!
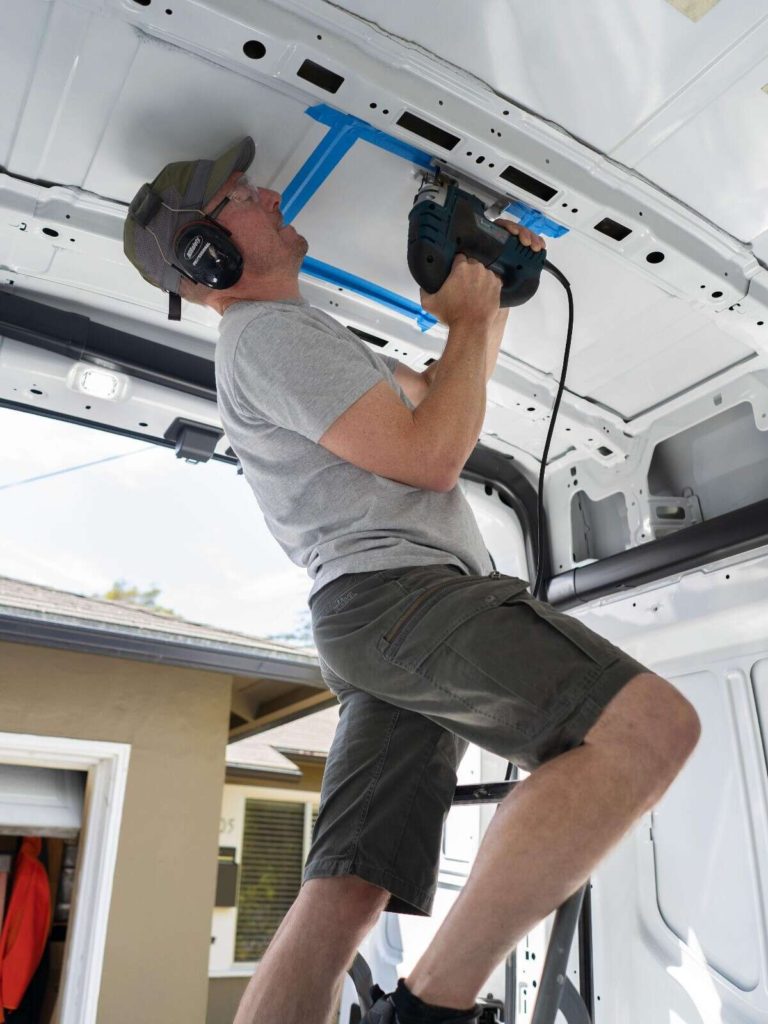
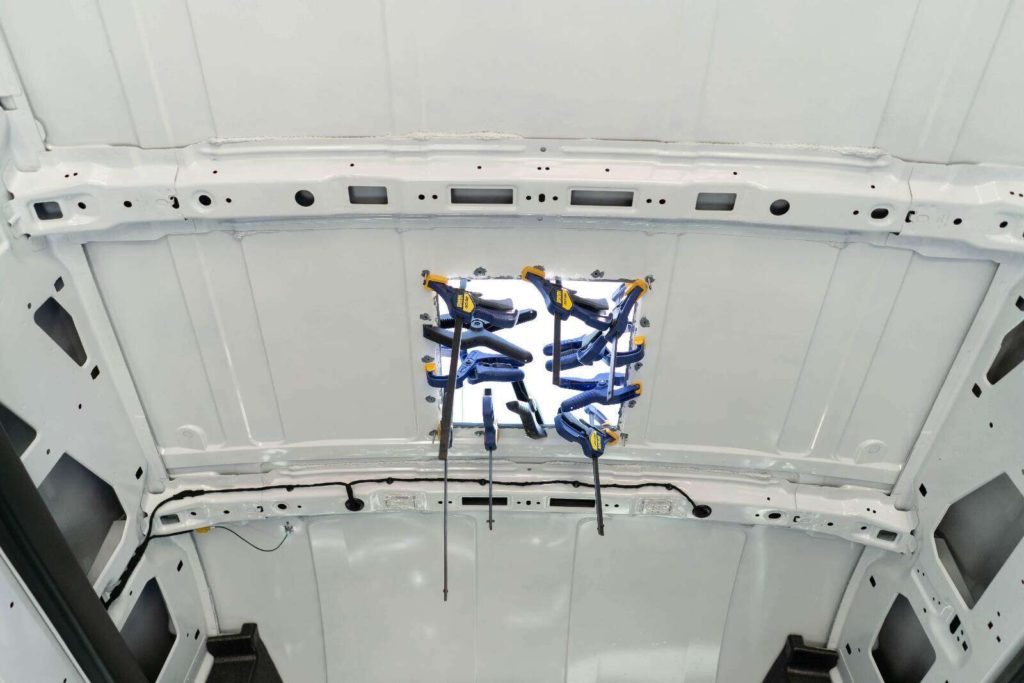
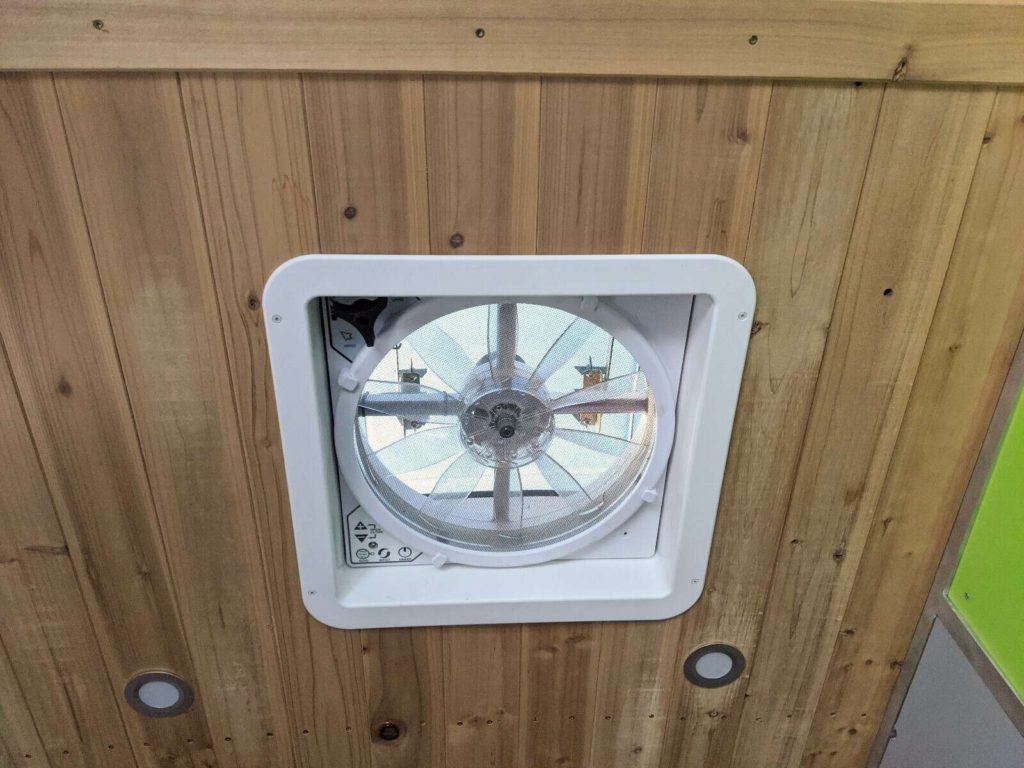
Fan Installation
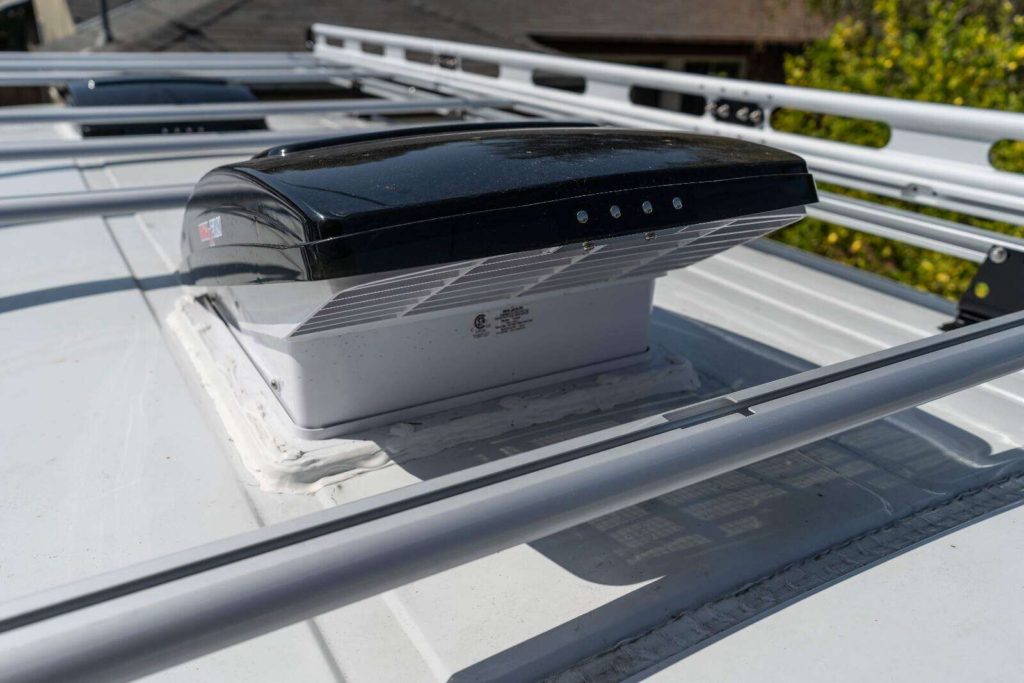
One of the best decisions we made was to have 2 fans, one in front and one in back. You need a just a tad bit of air pull to prevent condensation in the van, especially when it’s cold out. With 2 fans, one can pull air in and the other can push air out, giving a very nice breeze through the van. We had only 1 fan in our previous camper van conversion, and there’s no question that 2 fans are worth it. If you do 1 fan, place it in the rear so that you can crack a window in front and still pull air across the van.

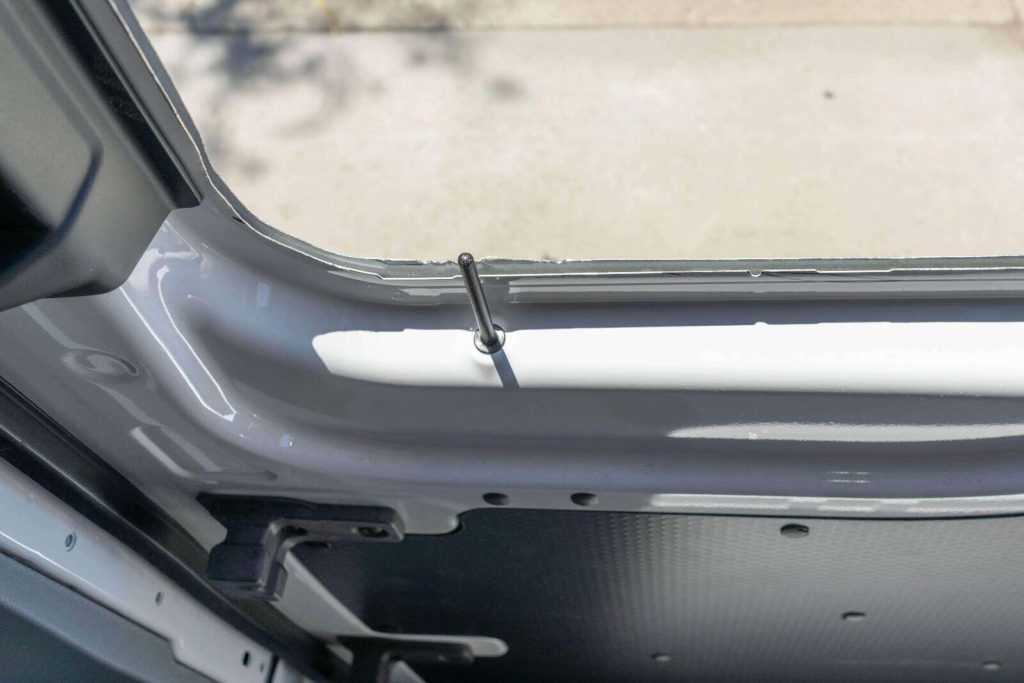
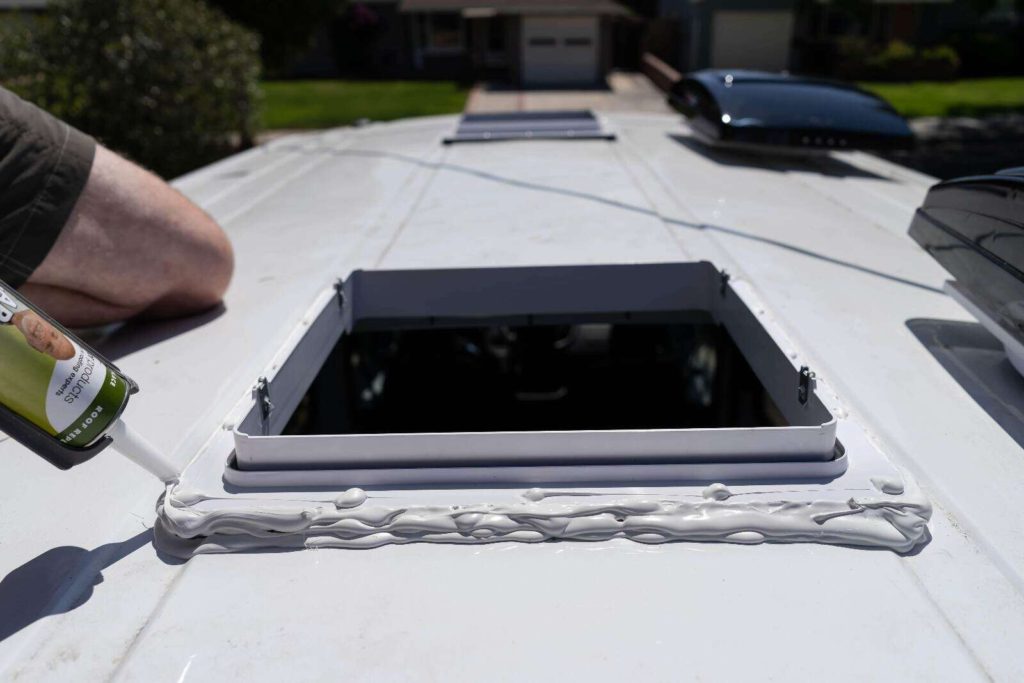
You’ll need a roof fan install kit with a Ford; you might be able to make do without on a Sprinter. Because of the roof angle and grooves, the fan won’t sit flush on the Transit without the adapter. It also provides more rigid support for the fan compared to only sheet metal. You’ll also need 3M Windo-Weld and Dicor self-leveling sealant. All these are in the Parts Directory.

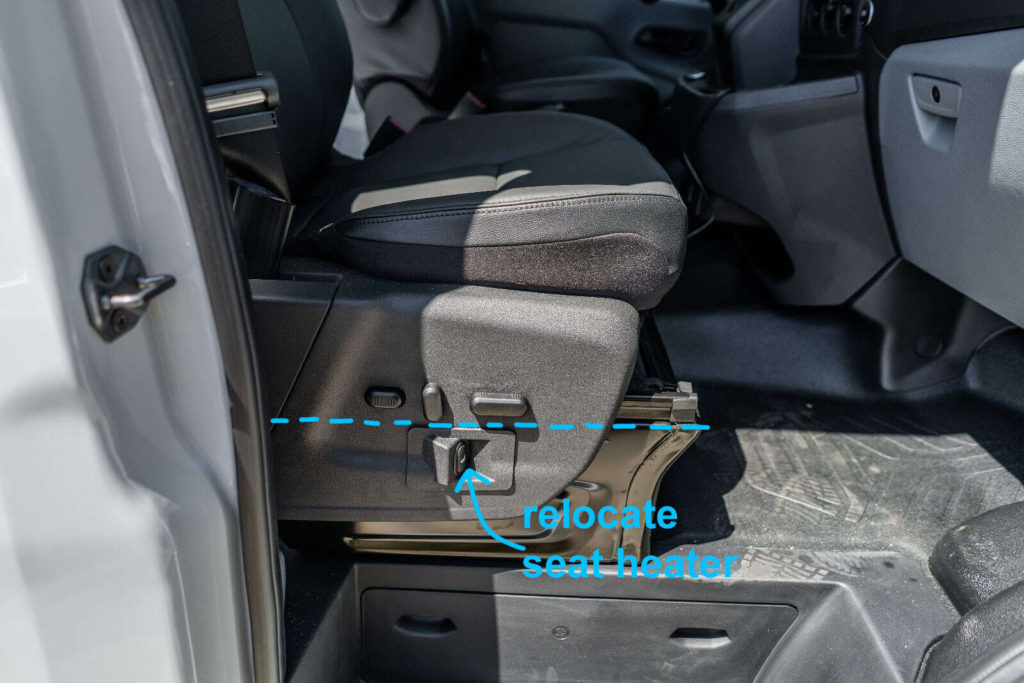
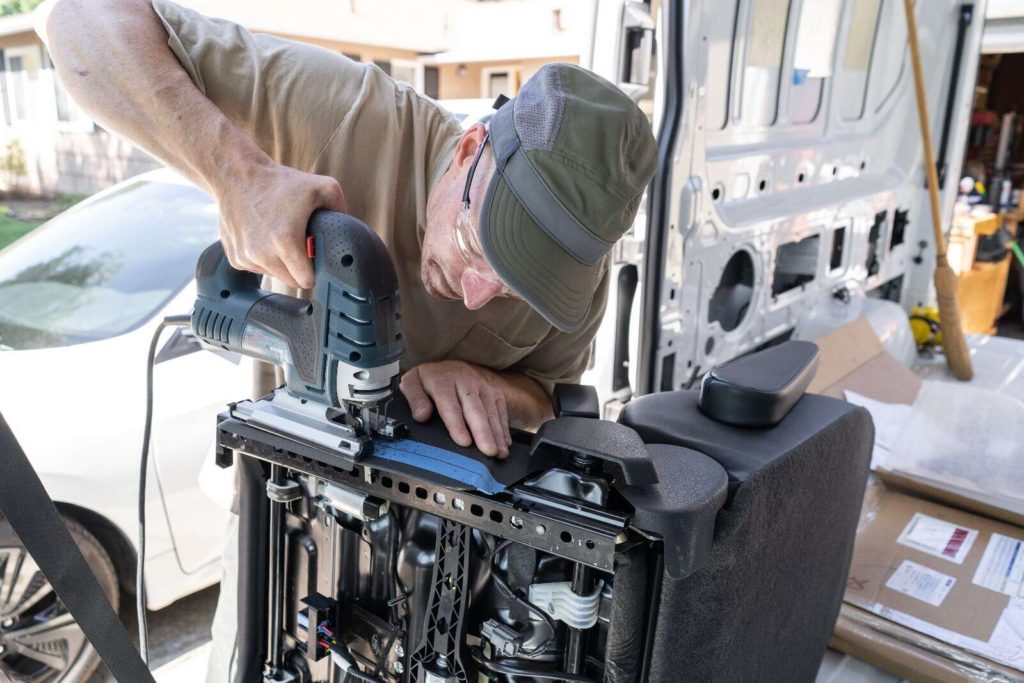
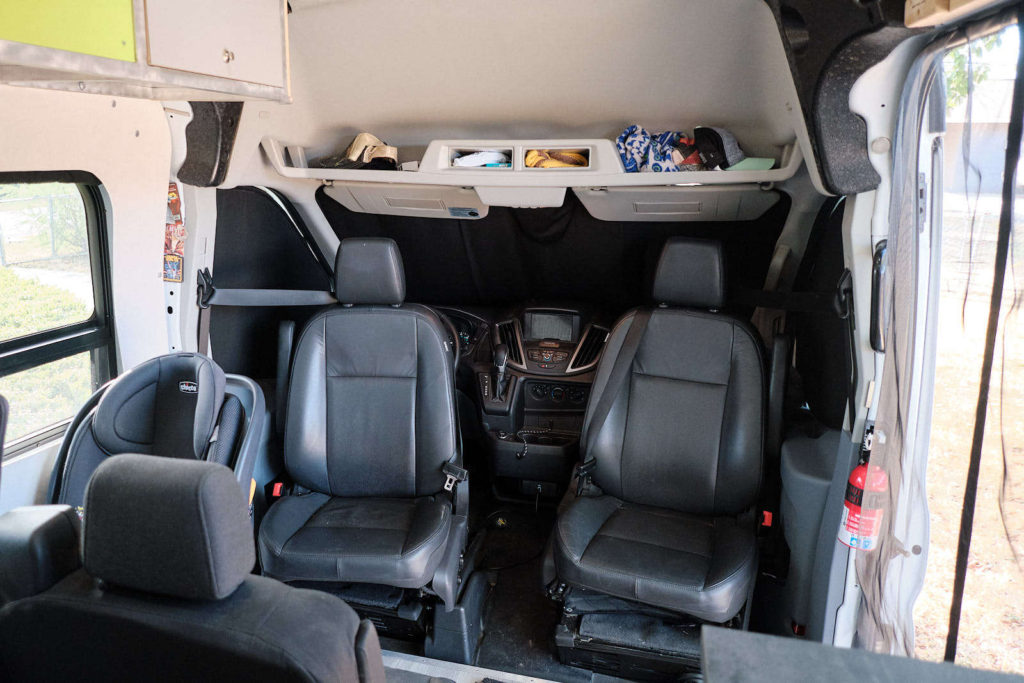
Swivel Seats
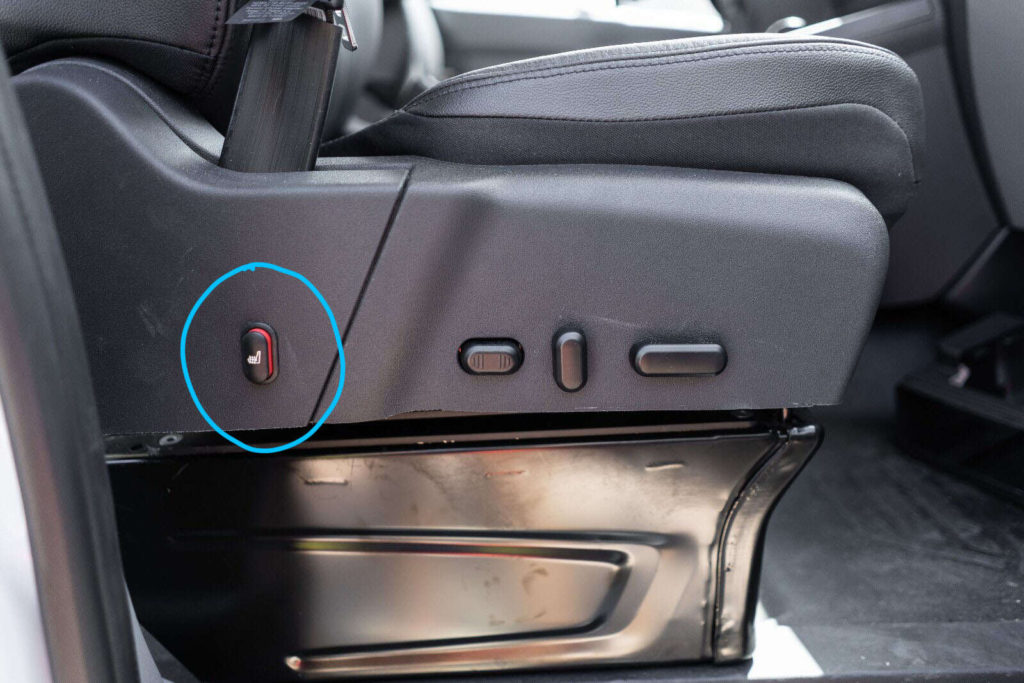
In the Ford Transit, if you have the electric seat/seat heater combo, you’ll have to trim the bottom of the plastic seat panel and relocate the seat heater button so there’s clearance to turn.
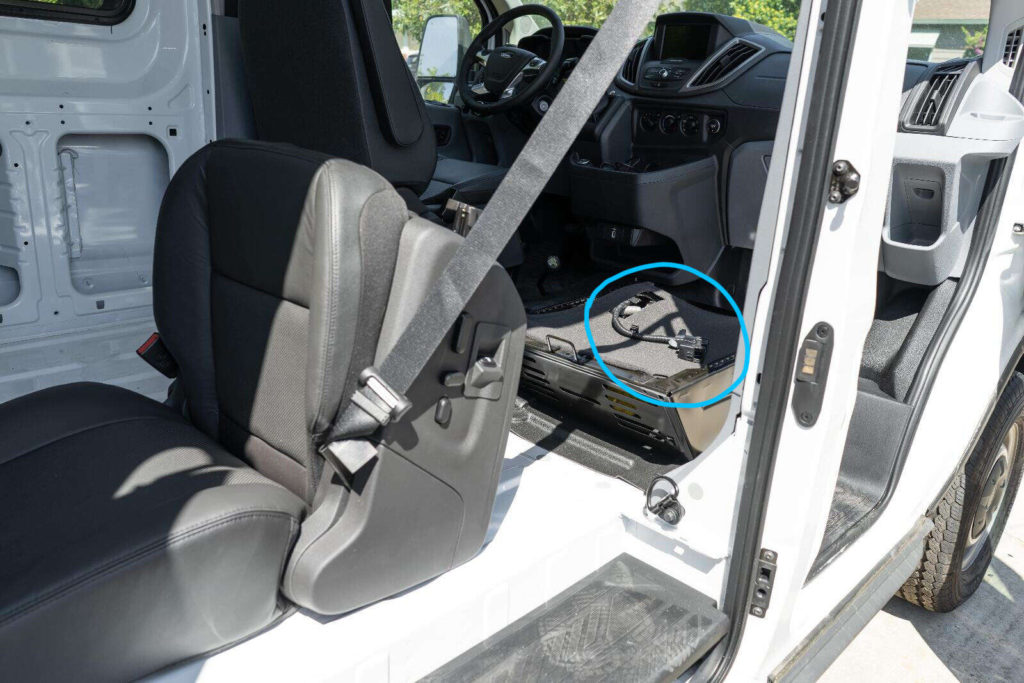
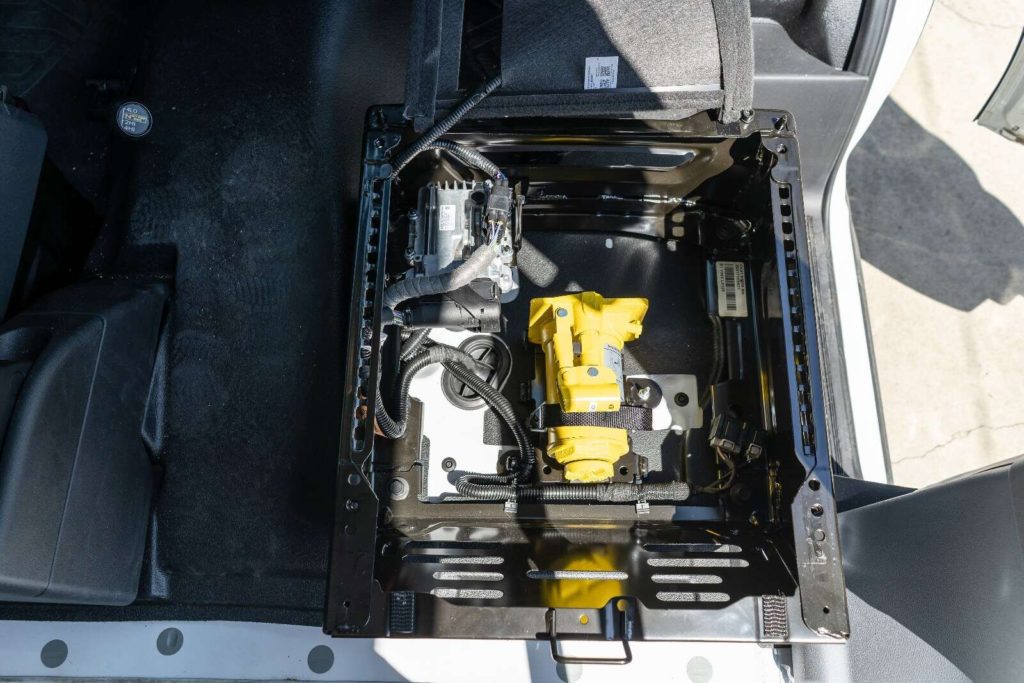
Lowering the e-brake on Ford Transits
The Ford Transit has a hand brake on the floor (why oh why?), so you’ll need to lower it to swivel the driver’s seat. You can buy a bracket to lower it, from a dealer like NomadVanz, with the swivel itself. It lowers the e-brake by over 2″ so that the swivel can clear. Who said a camper van conversion was easy?

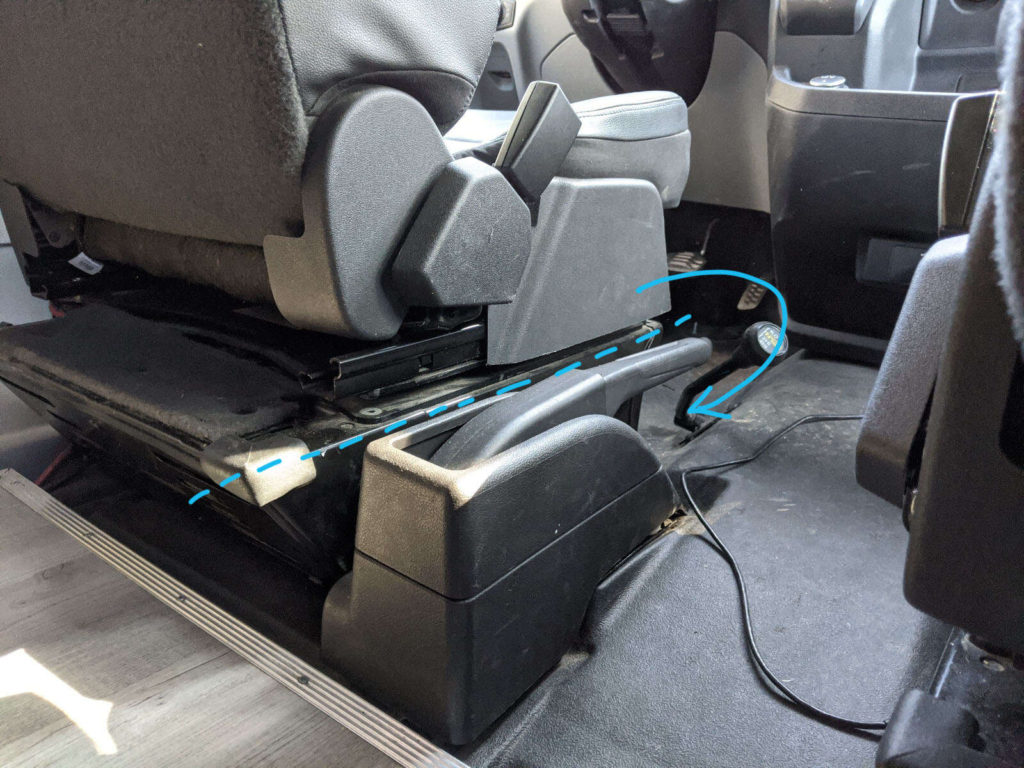

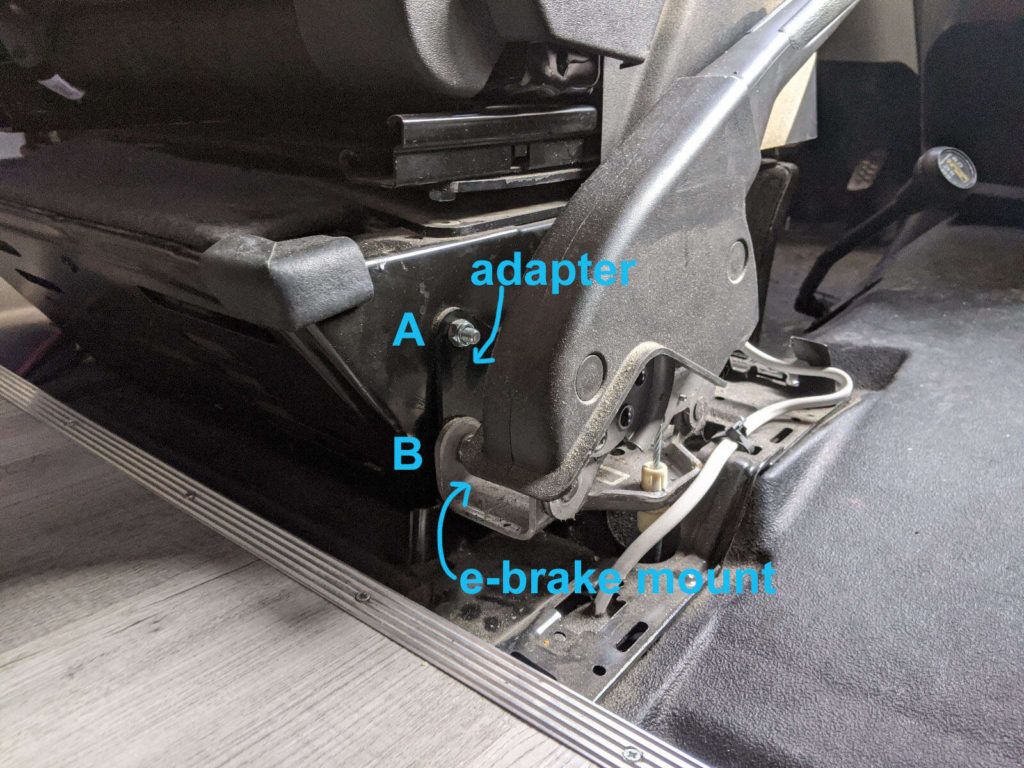
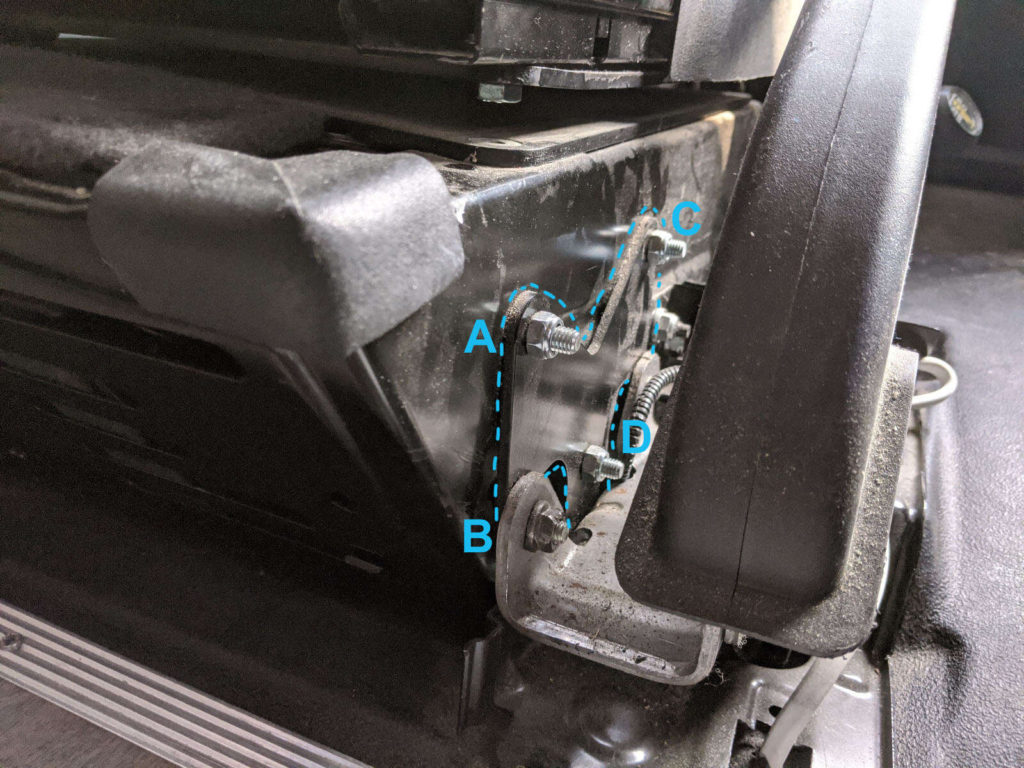
Lowering the e-brake isn’t difficult, but it’s tedious to remove the driver’s seat and move the vehicle starter battery under the driver’s seat so you have access to remove and install the bolts. There’s a much better step-by-step at FarOutRide.
4×4 Quigley Conversion + Tires
We purchased 4×4 through Quigley, the longest-run and most reputable Ford 4×4 conversion company around. Ford recognizes their work and it’s covered under Ford warranty. You can purchase a Transit at a local Ford fleet dealer with the Quigley conversion, and the Ford dealer handles the van delivery directly to Quigley, and finances it all with your vehicle loan. Quigley uses Ford 250 parts for the 4×4 conversion. It’s been great. It was $13k total. The 4×4 conversion added 2″ lift to the empty cargo van. Weighed down with the rest of our camper van conversion, it netted 1″ lift. When we added additional suspension (see below), we got back the 1″ for a total of 2″ lift.
In 2020, Ford started offering an AWD version of the Transit. Keep in mind it’s AWD and not 4×4. AWD is fine if you’re primarily driving on paved or graded roads, and it’s better in pure ice and snow. If you’re doing serious off-roading like in Tahoe or Indian Creek, you probably want 4×4.
If you don’t want to spring for AWD or 4×4, at least upgrade the tires. The stock tires are terrible, especially in mud and snow, even on a paved road. We have the BF Goodrich All-Terrain T/A KO2s 245/75/R16. They make a ton of difference, and they’re surprisingly quiet for all-terrains.

The 245/75 tires are larger than the 235/65 stock tires, so (1) your odometer will be off by 8% (e.g. if your speedometer reads 60mph, you’re really driving ~65mph) and (2) you’ll need to shave a little off the wheel well so the tire can clear. This is a good article on how to trim it.
Adding Suspension
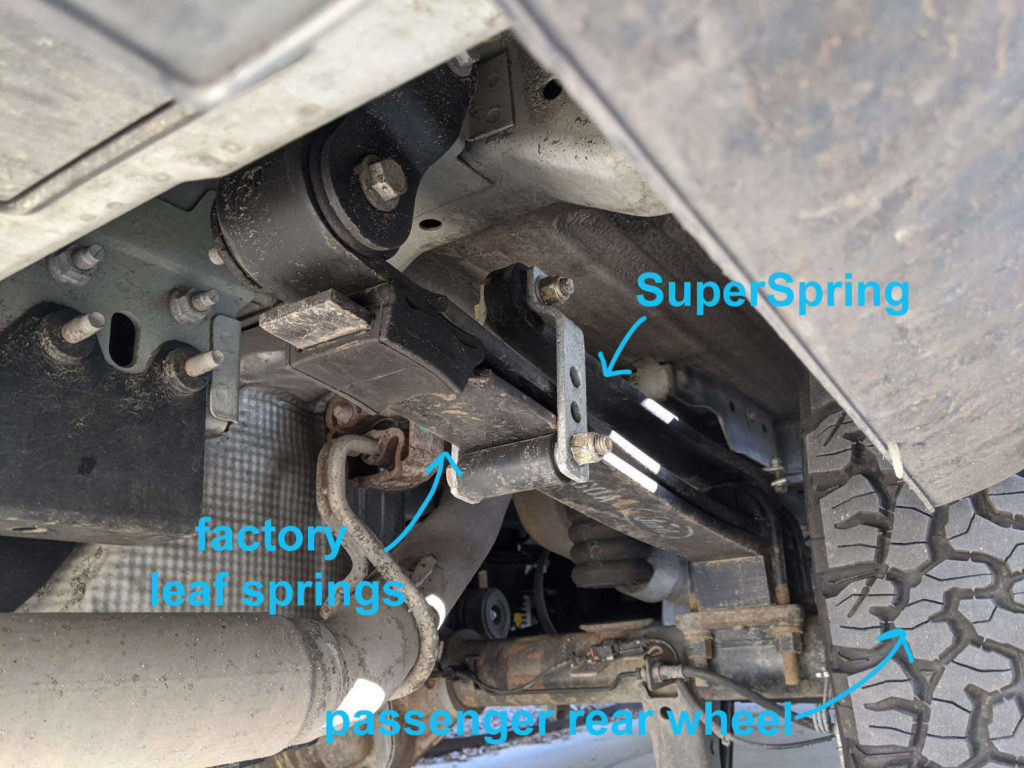
Weighed down with fuel, water, and gear, we added 2800lb to the vehicle. With so much weight on the van, and most of it in the rear, we wanted more stability especially when off-roading. From experience in our old van, a stiffer ride is much more comfortable and results in much less car sickness, especially for passengers.
SuperSprings
They’re ~4.5ft long and mount lengthwise from front to back above the factory leaf springs. They reduce sway and prevent sagging.

SumoSprings
These replace the factory suspension in the rear. They’re 1500lb capacity, helping absorb bumps and shocks.

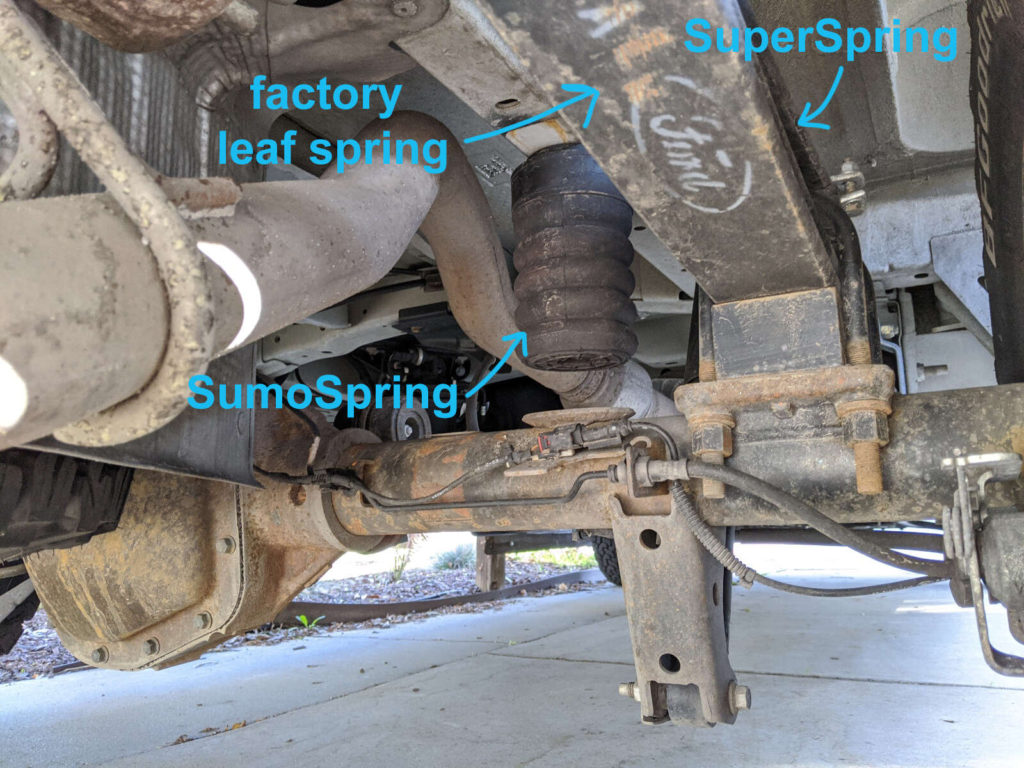

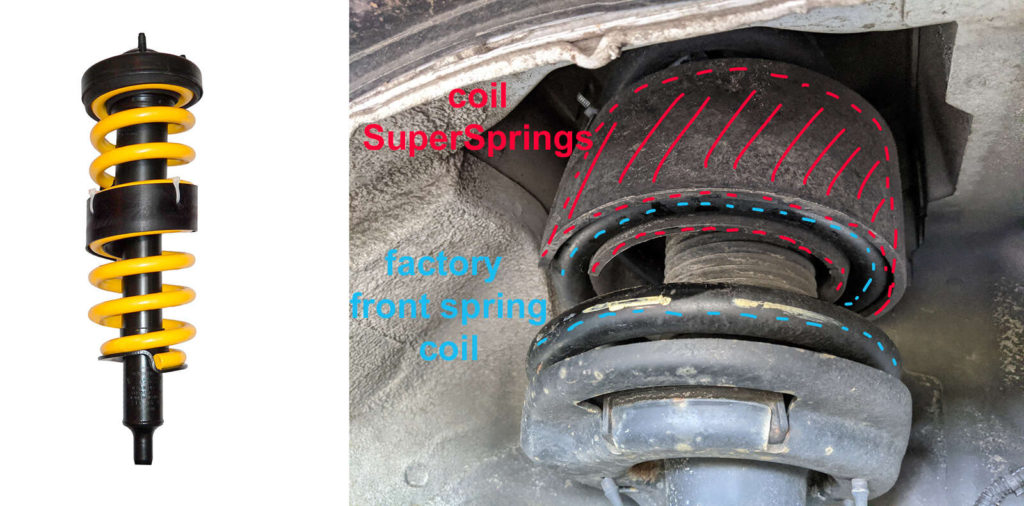
Aside from the terribly confusing product names of SuperSpring, SumoSpring, and Coil SumoSpring, they weren’t bad to install; 1 person could probably manage.
Roof rack and ladder
We installed a VanTech roof rack, which has performed very well. Our roof rack, ladder, and awning are silver, which makes us look like a true utility van rather than a camper van conversion–handy when you need to crash on the street. We didn’t install 2 of the cross-bars where our 2 fans are located.
The one thing we don’t like is the rack sits up high off the roof, about 4-5″. The side bars are also quite high, which probably have an impact with partial shading on the solar panels when the sun angle is low. Choose a roof rack long enough, or installed close enough to the front of the cab, so your awning covers your whole sliding door.
We considered Prime Design roof rack, but there’s a bar that runs the length of the side channels. We thought it’d be too easy for debris to get stuck in. Aluminess racks look great, but are twice as expensive (almost $3k!).
Our ladder is Prime Design by American Van. It’s sturdy and doesn’t require drilling. We attach crash pads to it if we don’t have room inside our cargo area.

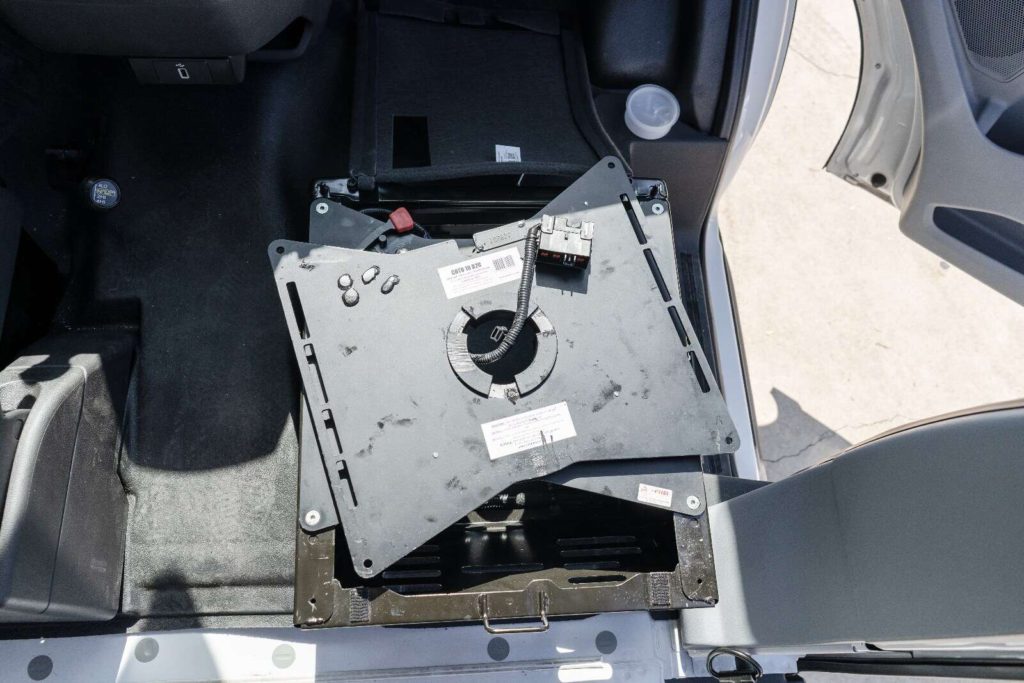
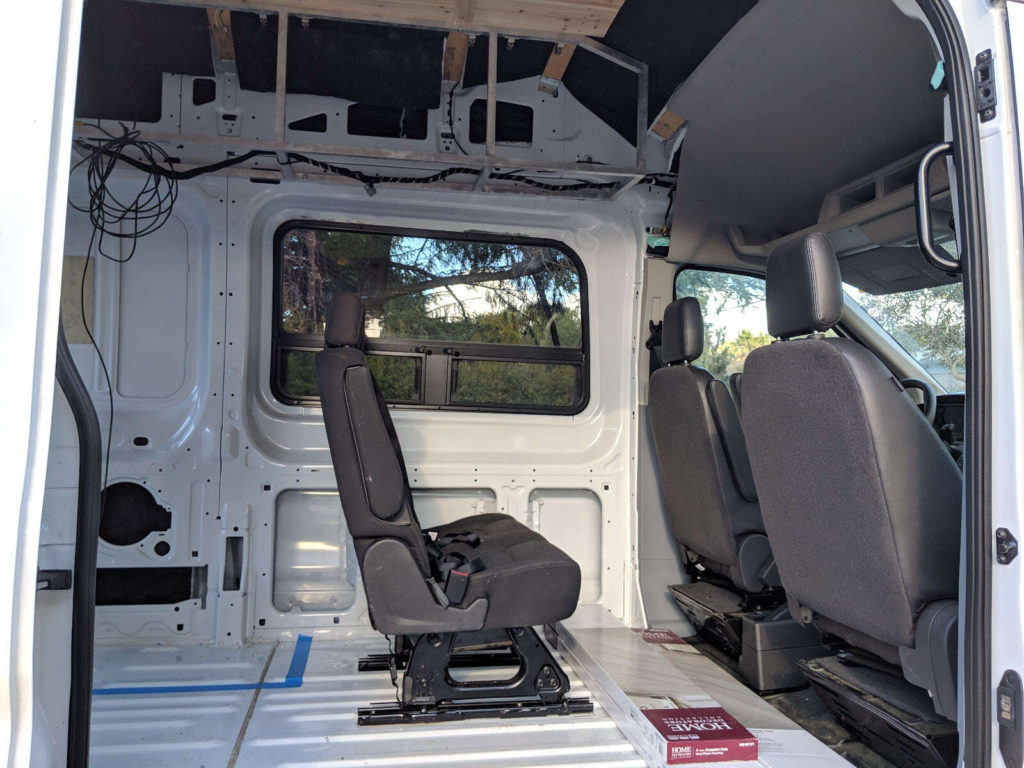
Second Row Bench Seat
Since we bought a cargo van, it didn’t come with any seating other than the cab seats. If you buy a passenger van, the mount points/rails and bench seating are included. Sprinter cargos come with the seating mount points, but the Transit cargos don’t. Mounting the seat ourselves rather than having the default factory passenger van mounts meant we could mount it 2-3in closer to the side wall.
We found the Ford OEM bench seat through a local van conversion dealer that works mostly with corporate companies like Enterprise. They change and outfit passenger vans so much that they sold us the seat. The seat is quick-release-detachable from the mounting rail, so while it’s heavy to remove, it’s possible, and was very handy when building the van.
We mounted the bench seat through the sheet metal floor with four 4in X 6in x 3/16in sheet metal plates. We secured it with 0.5in grade 8 bolts and stainless steel washers. The seat isn’t going anywhere–and if any force were large enough to pull it out, you’d suffer from a crushed chest first.
What we would do differently
- Install a CR Laurence T-window on the driver’s side and get a factory window on the sliding door. We ended up opening only the driver’s side window almost exclusively. That’s the side we normally cook on, and we have to remember not to slam the sliding door while the louver window is open. Plus, only half the lower window opens on the sliding door side since the door lock stick is in the way. We’d get a factory window on the sliding door, so we don’t give up the window, but we don’t need the louvers.
- Use different swivel seats. The Scopemas are a lower profile than the competition, but they’re more finicky to unlock to turn. But, the height profile isn’t an issue if you have height-adjusting seats on both the driver and passenger side. We had Swivels R Us swivels in our old van and liked their operation much more. If you don’t have height-adjusting seats, and you’re under ~5’6″, your feet aren’t likely to reach the floor with Swivels R Us. We made a 2″ block in our old van under the passenger side floor mat so I could sit comfortably.
- Consider AWD since it’s an option on 2020 models, instead of Quigley 4×4. AWD isn’t available with Diesel, however.
- Make our own roof rack. Now that we’re more proficient with welding, we’d make our own. It likely won’t save any cost, especially considering time, but we can make it the profile we want.
- Consider a bench seat that folds up. The Freedman company sells a model seat called the 3PT double fold-away seat. It attaches to the side of the van rather than the floor, so you can flip the back rest down and the whole seat against the side of the van. It’d give more floor space for kids to run around, albeit less seating area, and you’d have to find a place to put carseats.
→ Explore more articles in Camper Van