What you’ll learn
This article is part of the Camper Van Conversion series, focusing on somewhat more fun stuff, the control panel and monitoring for your camper van electrical system. Spending just a little more time and money on your camper van conversion will allow you to accurately monitor and diagnose system issues.
This post contains affiliate links. I’ll receive a commission fee if you click on a product link. Your buy price doesn’t change, but the commission I receive from the retailer goes to the maintenance and hosting costs of this website.
Control Panel
We put the control panel in the sliding door. We find it to be very convenient no matter where we are in the van. Given that we have 2 large windows rather than wall space above the galleys, we didn’t have much other option for a central location. We gave up the ability to have a flip-up countertop extension.
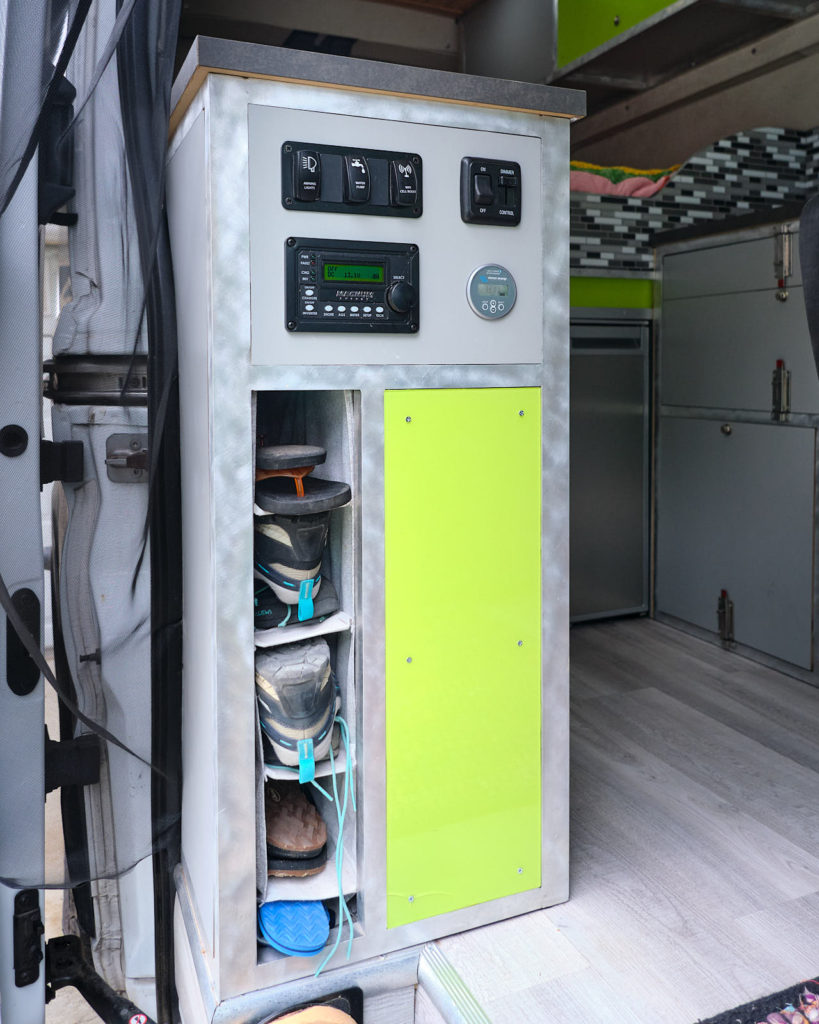
We ran any wires needed from the electrical cabinet on the driver’s back side to the control panel, the water heater/pump (also on the passenger side), and charging outlets under the floor laminate in a gap through the rigid insulation. I forgot to take photos.
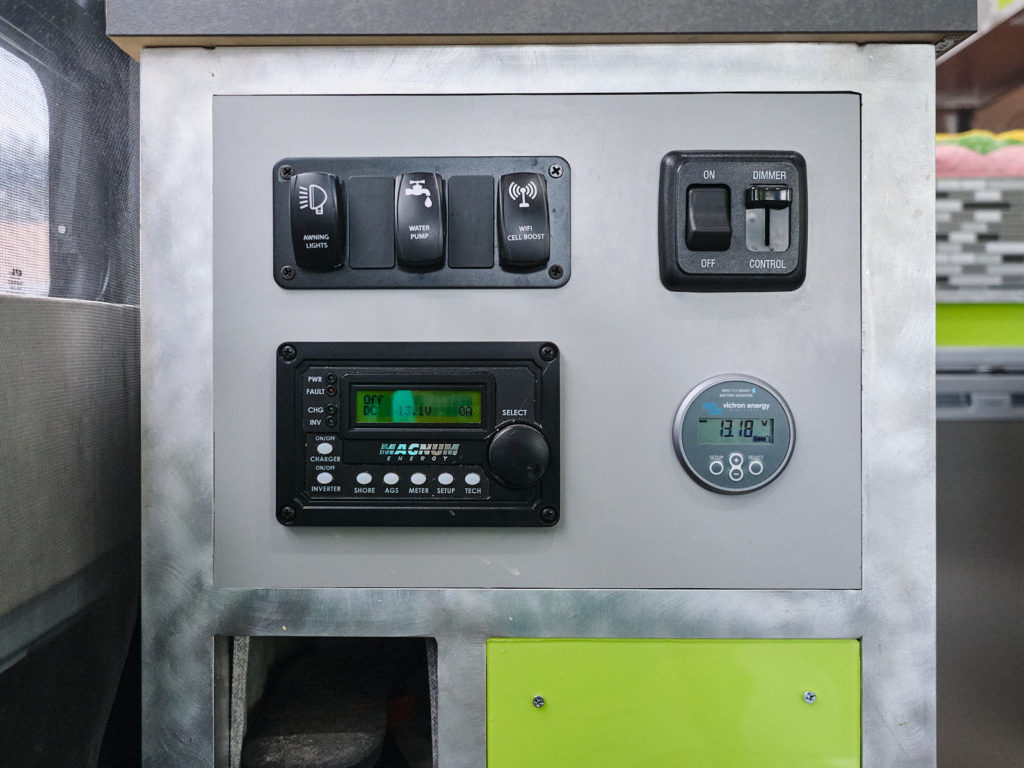
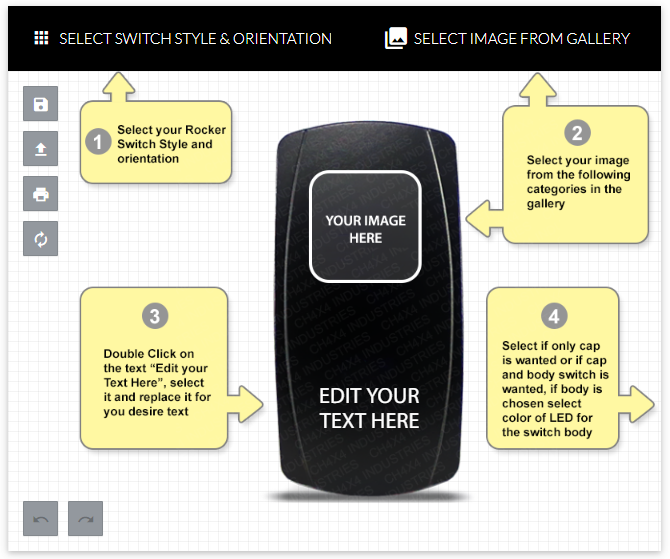
Custom rocker switches
You can custom-make your own rocker switches from CH4x4. We highly recommend no LED or red–they’re quite bright. Design your custom switches that fit into a panel. I recommend getting a larger panel than needed in case you add switches later, and put a blank cover on the unused ones.
Monitoring
The Victron SmartSolar MPPT 100/20 Solar Charge Controller and the Victron BMV-712 Battery Monitor with Battery Temperature Sensor are well worth the extra money for the smartphone app capabilities. They both link into the same app, which is very convenient.
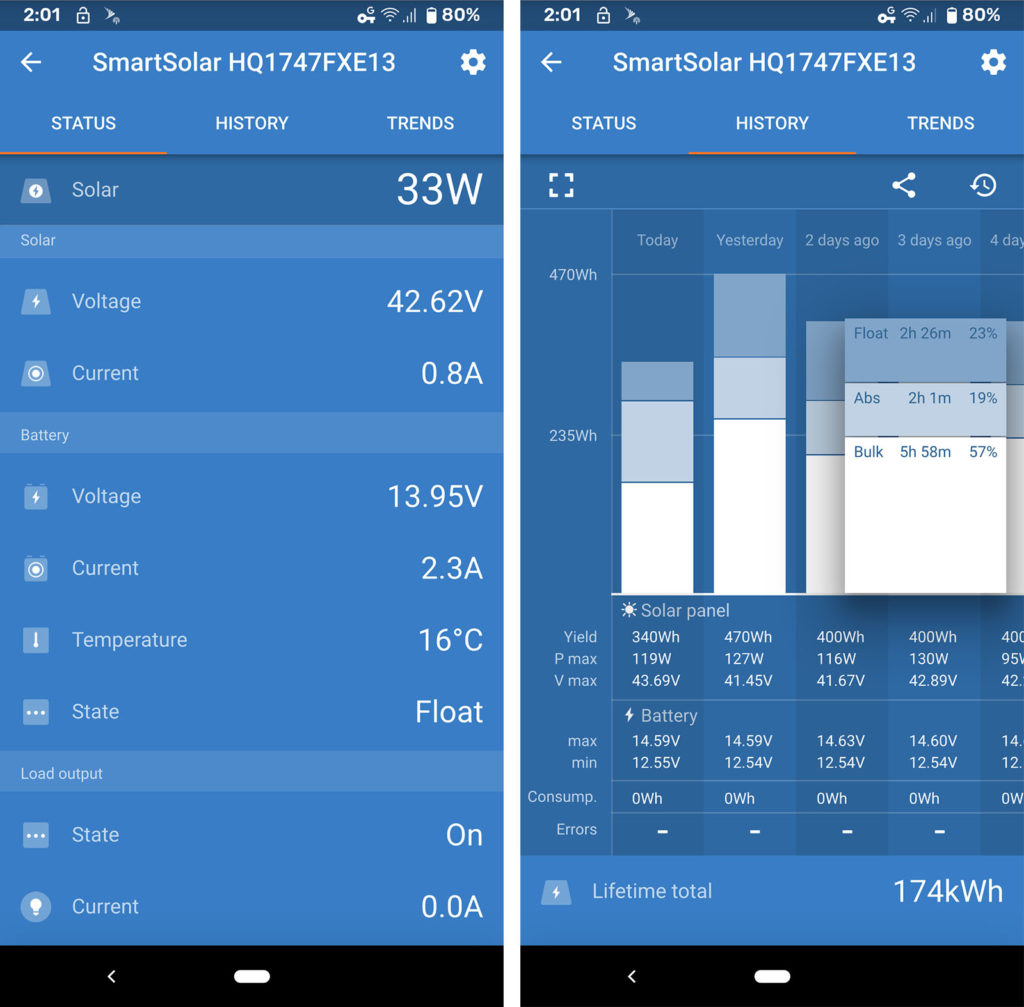
The solar status (left) shows the voltage and current at which it’s charging. Here it’s 0.8A, or hardly anything, since the battery is almost full and it’s in the Float state. There’s some battery information (that you can also get in the battery section), showing a voltage of 13.95–right on par with the battery float charge state. Everything is turned off in the van, so the draw is 0.
The solar history (right) shows your bulk, absorption, and float states per day, which is helpful to evaluate how much solar you’re getting when it’s overcast or you’re under partial shade. The watt-hours yield (“Yield”) and max power (Pmax) are invaluable to understand and optimize your system. In fairly sunny winter days in Northern California, we average 400Wh total yield per day. At the theoretical maximum yield of 4x 100W solar panels, that’s only (400Wh)/(400W) = 1hr of theoretical perfect sunshine. Our van was parked in our driveway with no partial shade, but the sun intensity and lower angle result in much lower yields. Another way to look at this is our peak power is about 120W, which is well below the theoretical max of 400W. This is why also having the alternator charge is critical.
Recall in Camper Van Electrical System Part 1 that our load calculations resulted in 115Ah of usage per day. If we’re getting 400Wh total into a 12V battery, that’s (400Wh)/(12V) = 33.3Ah from solar charge, much lower than the 115Ah needed. This is based on winter sun, but we also only travel in fall and winter.
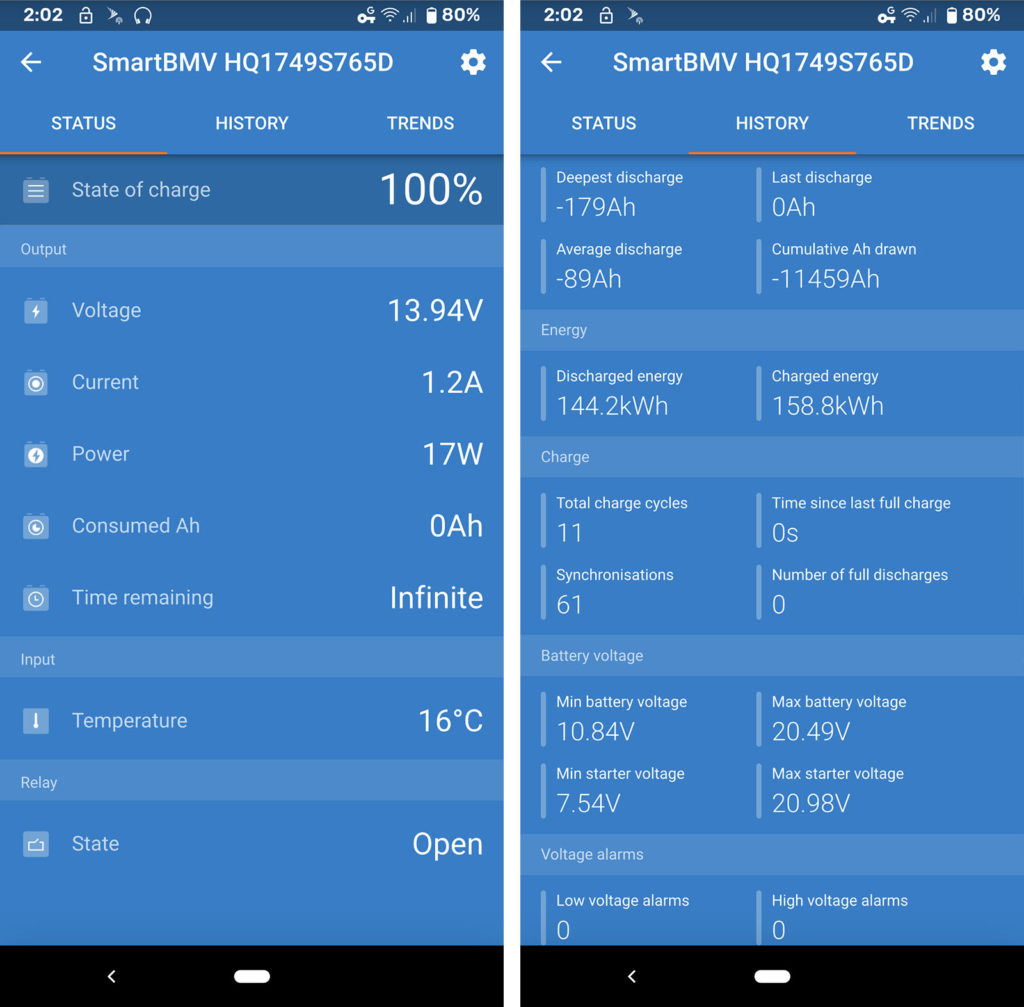
The battery monitoring part of the Victron app is similar, showing more details on the state of charge, the remaining time to full charge, and history. Positive current means charge is going into the battery; negative current means there’s a load.
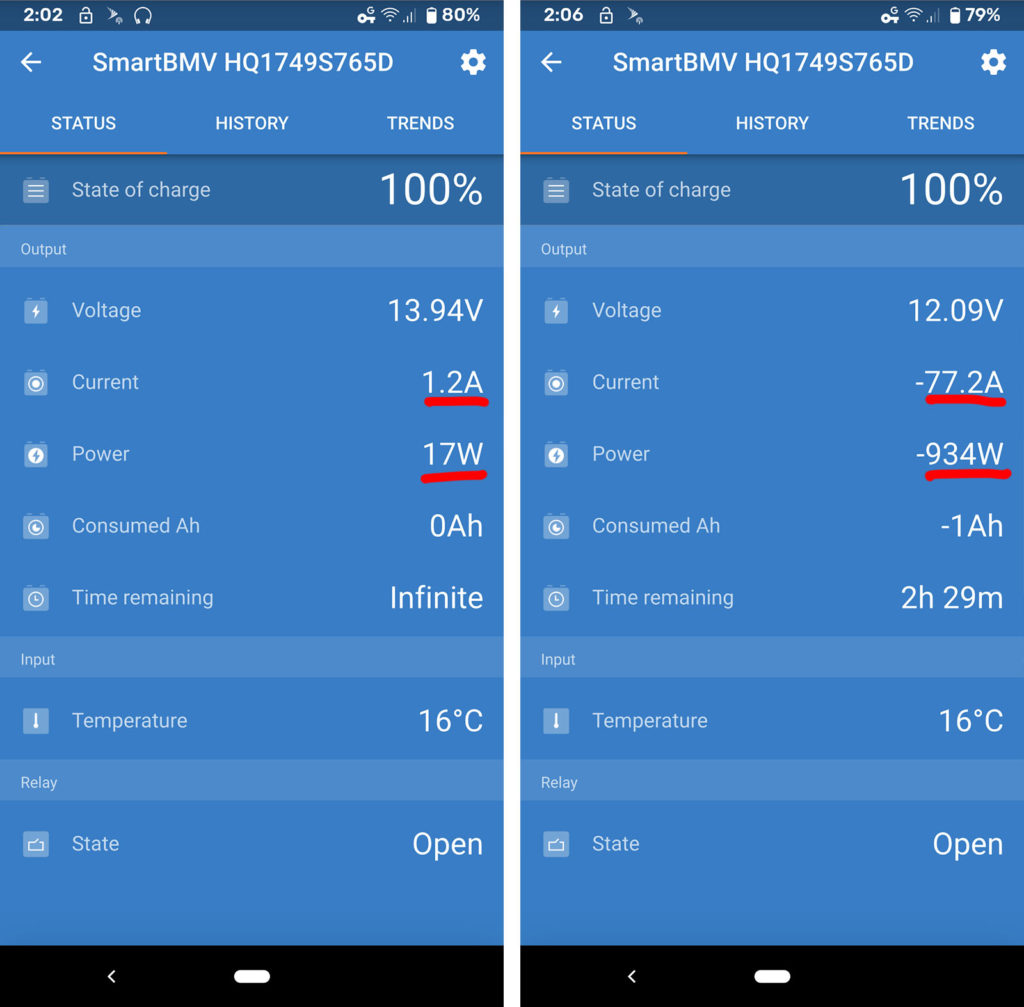
Above screenshots are when the inverter is on with a 1500W electric tea kettle. When it’s first turned on, it draws over 900W; at 12V, that’s 900W/12V = 75A. That corresponds to what the app says (-77.2A draw + 1.2A input from solar – 2A required for inverter = 74A).
And so completes the series on the Camper Van Electrical System.
What we would do differently with electrical
- We’d make the electrical panel more modular and/or more accessible. Our bedframe is one piece that sits above the electrical cabinet. We can’t remove the bedframe with the galleys installed. We’d make the bedframe in 3 pieces.
- A completely different idea is to put the electrical cabinet and water tank in-between the wheel wells rather than above. It’d be shorter but taller, perhaps allowing more vertical breadboard-like configurations. The extra width of storage across the wheel wells would be very awesome for laying out bouldering crash pads.
- Install 2 more lights above the bed. We have 8x 3W LED pucks on a dimmer, but it’d be really nice, especially with kids sleeping earlier than you, to have reading lights above the bed. These would go on a separate switch.
→ Explore more articles in Camper Van