What you’ll learn
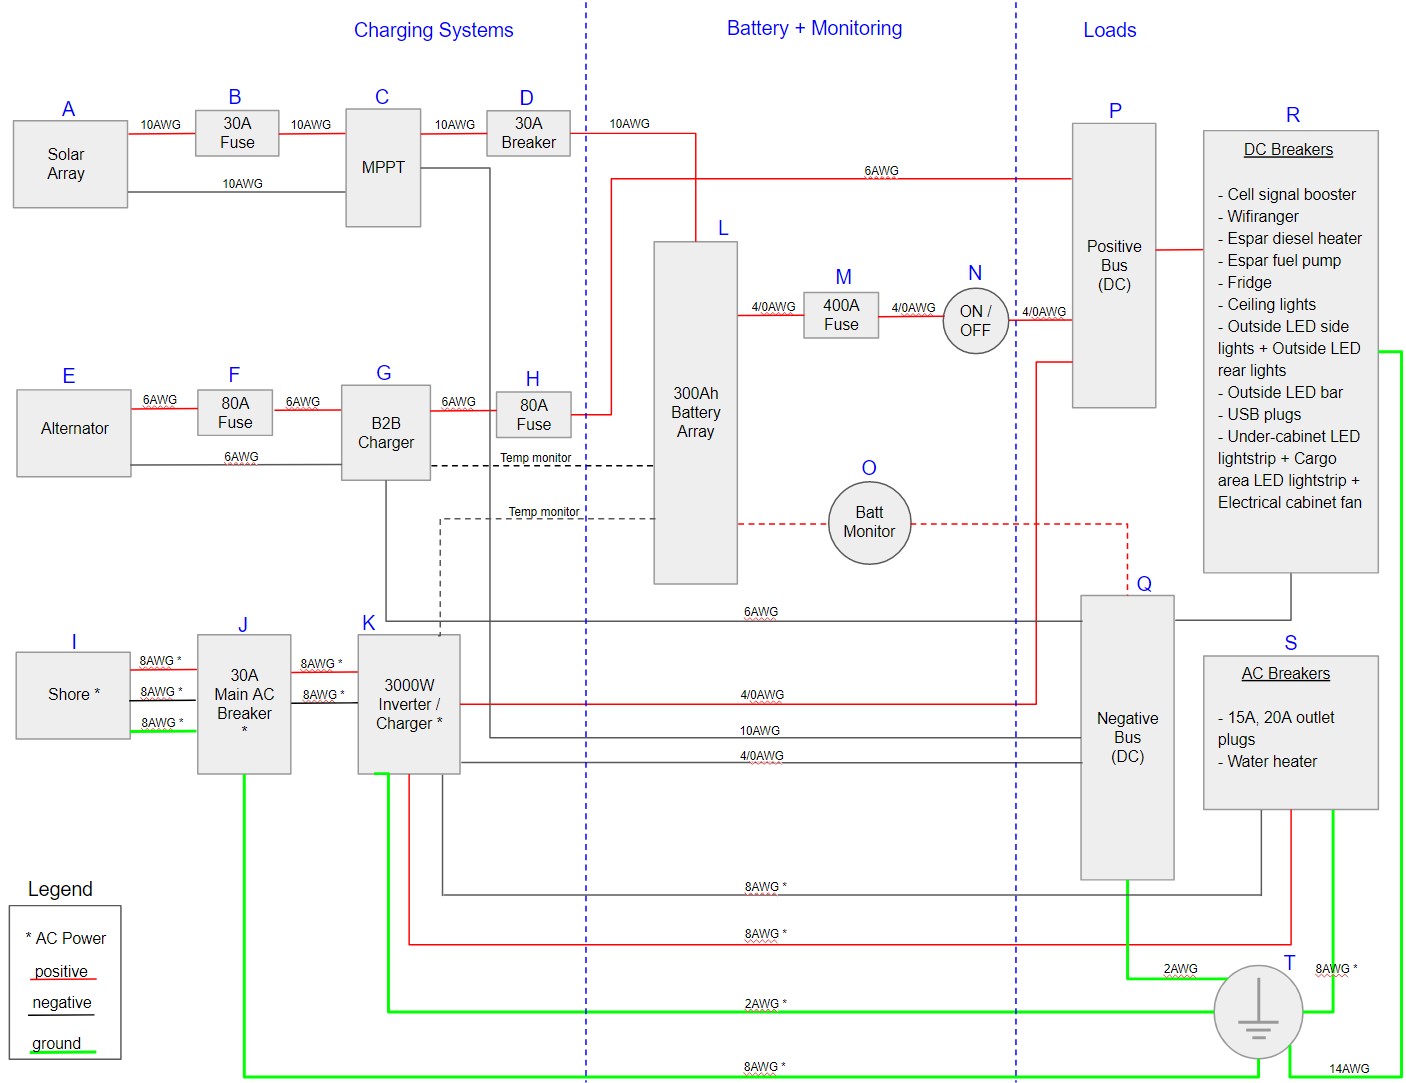
This article is part of the Camper Van Conversion series and explains the dirty hands-on of building a camper van electrical system and how to transform paper theory into physical objects. The previous article was an overview of the major components. Here’s our wiring diagram:

This post contains affiliate links. I’ll receive a commission fee if you click on a product link. Your buy price doesn’t change, but the commission I receive from the retailer goes to the maintenance and hosting costs of this website.
Paper to Physical Locations
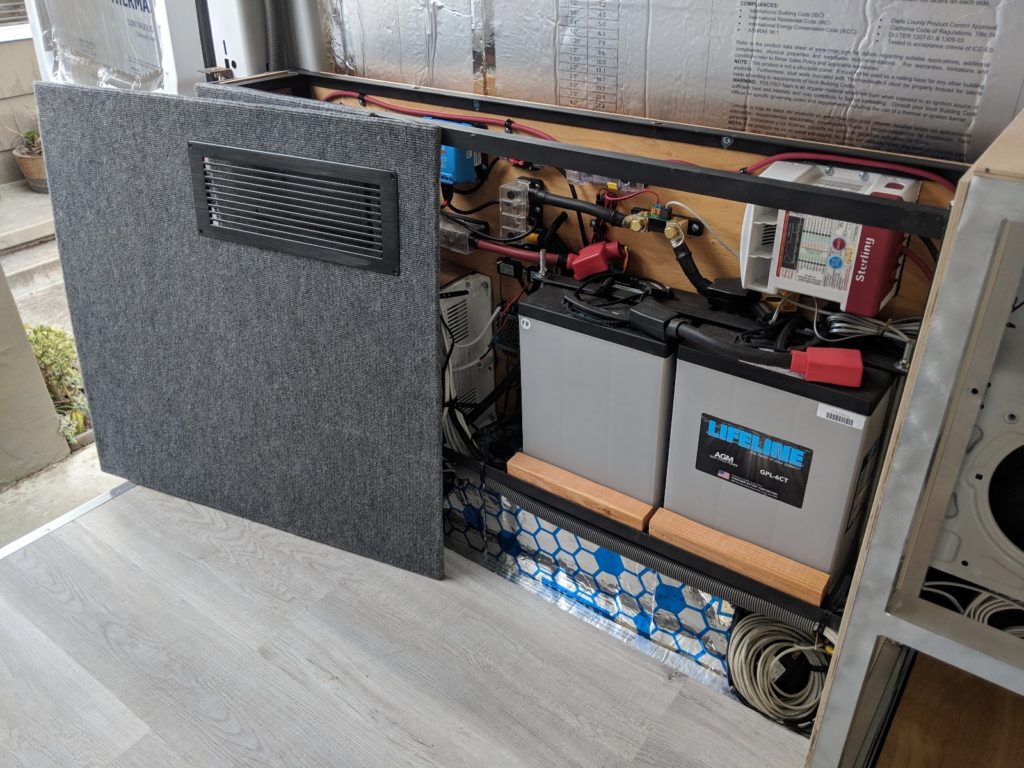
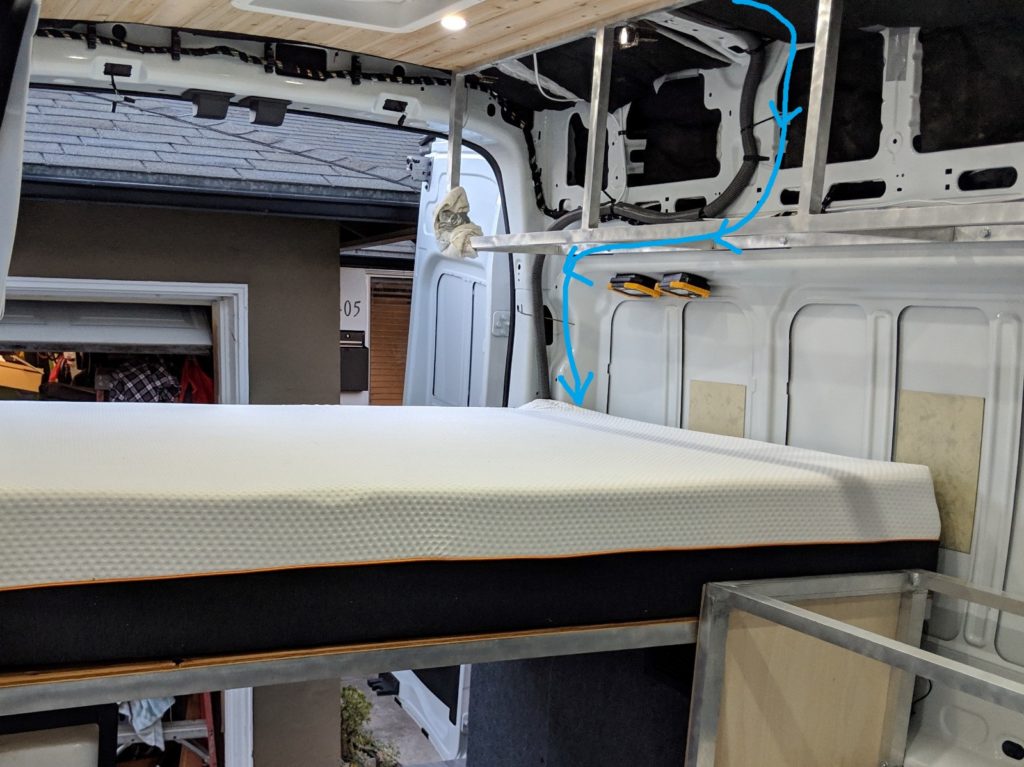
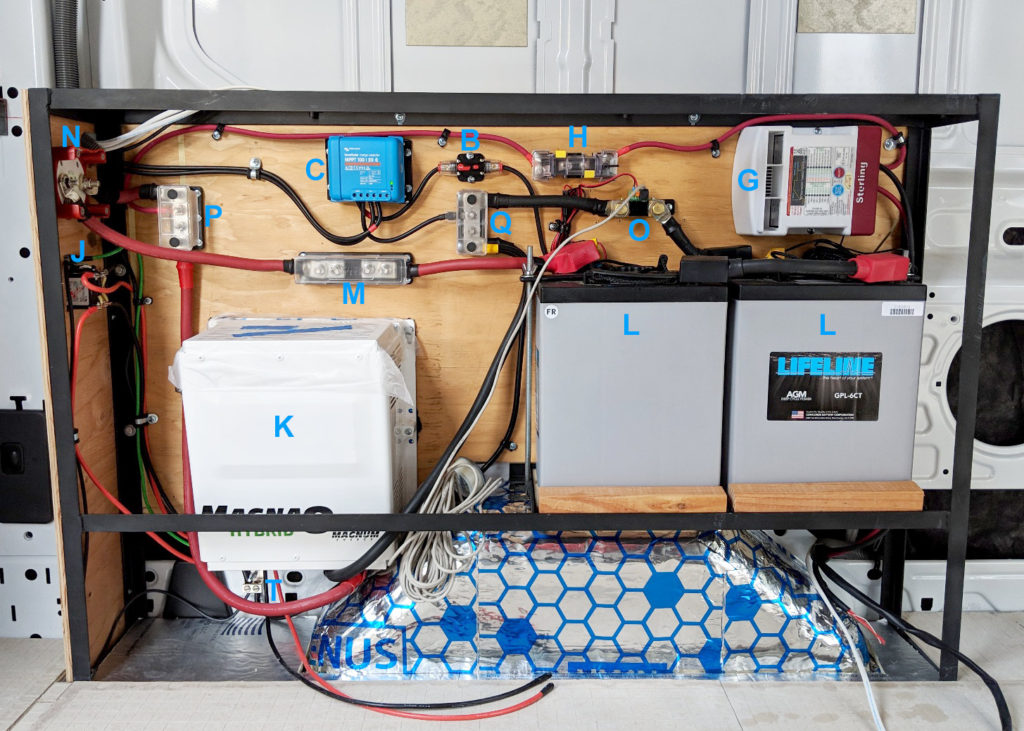
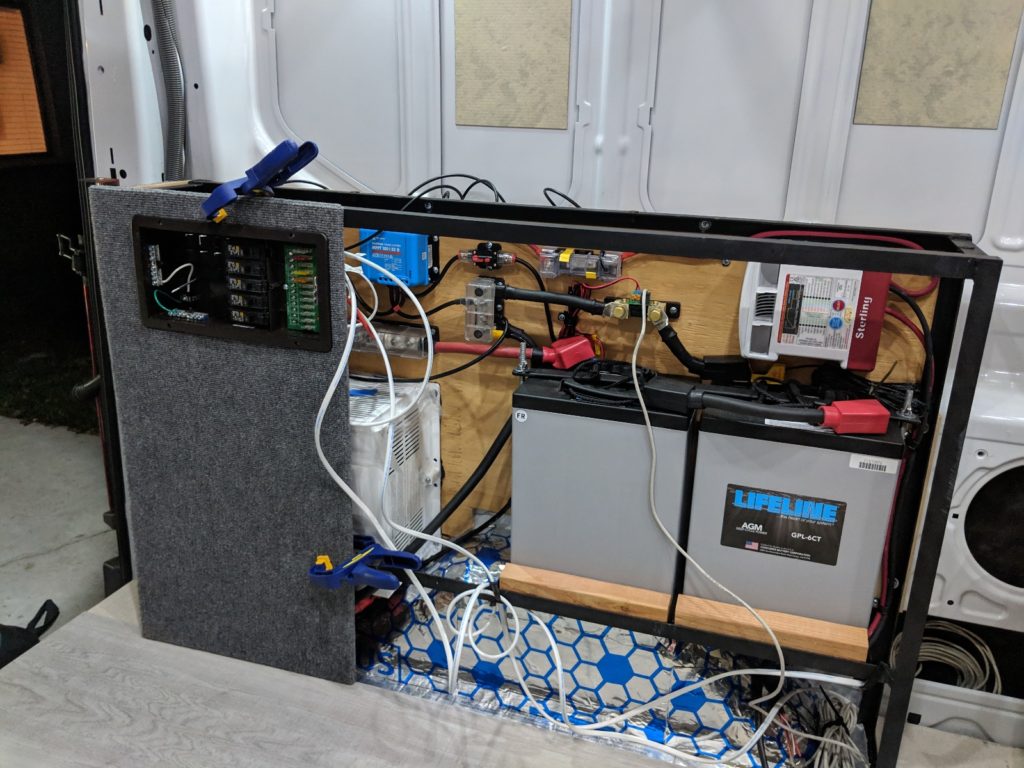
Electrical box: the hub. First determine where you want your electrical box with your batteries, inverter/charger, and DC buses. In most vans, it’s over a wheel well–it’s about the perfect depth and out of the way, and it’ll provide a support for your bed with the water tank above the other wheel well.
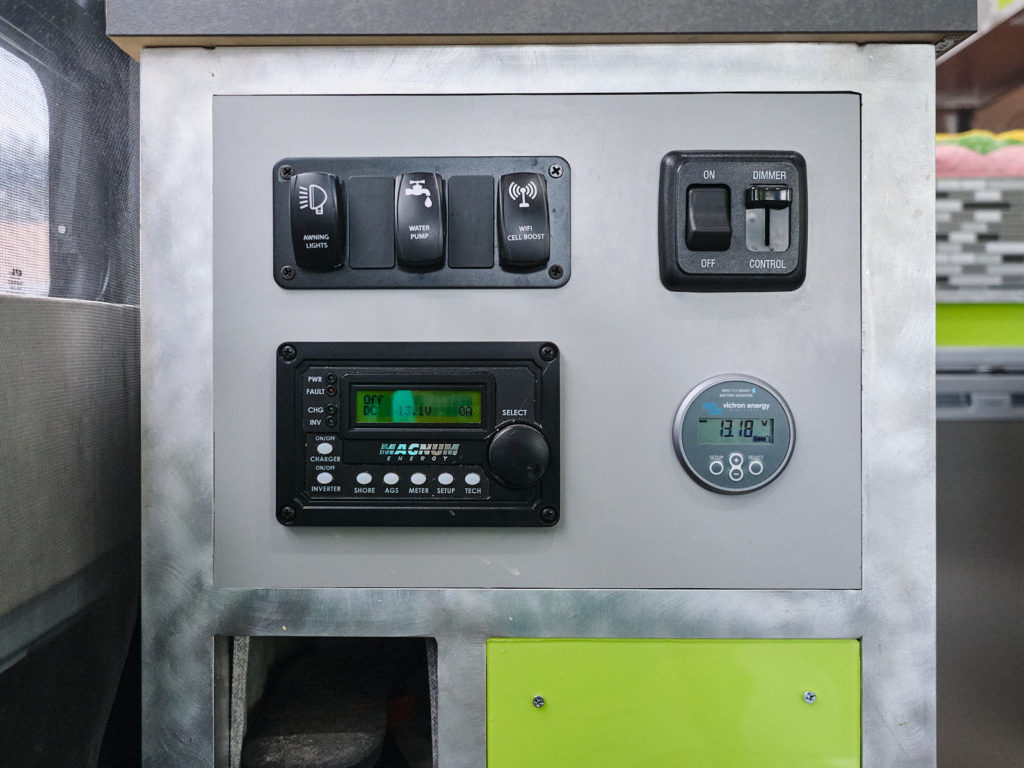
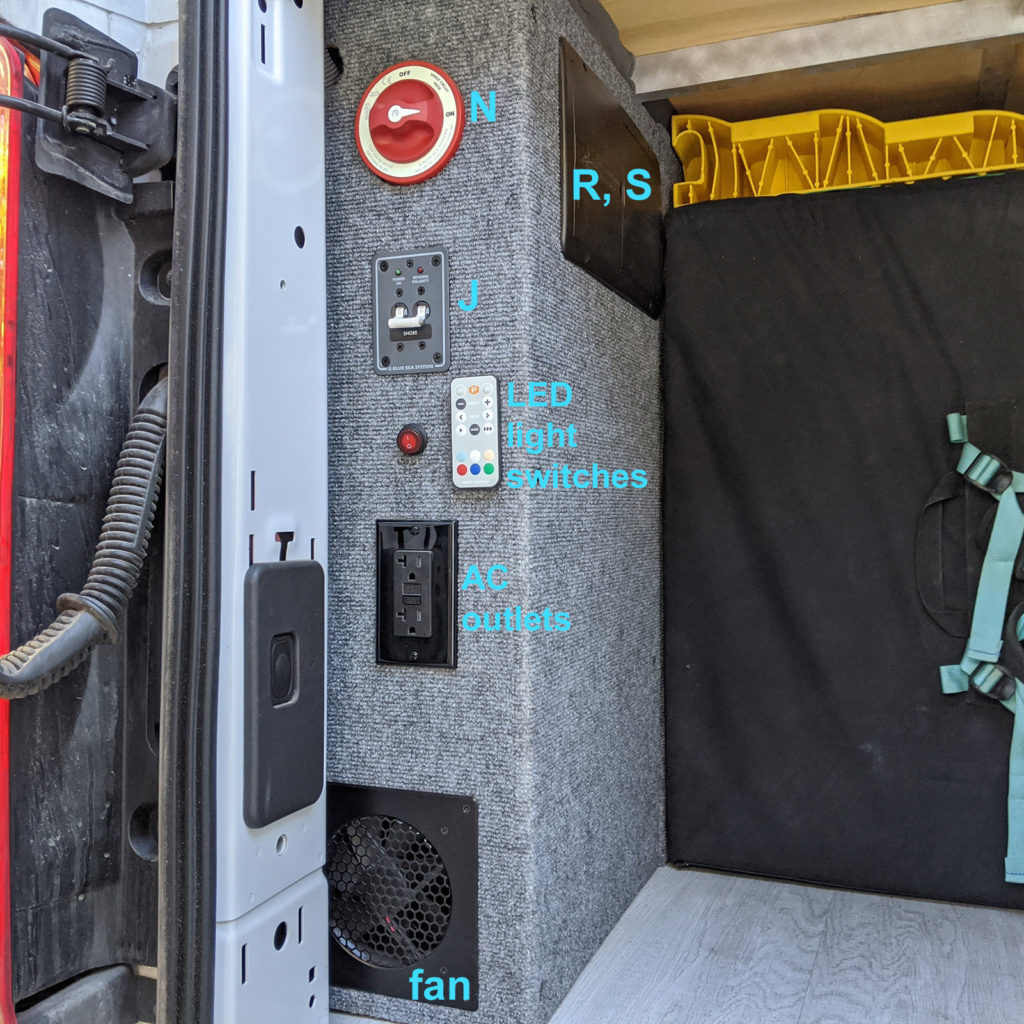
Control panel. Then determine where you want your control panels for the battery monitor, inverter/charger, lights, water pump switch, etc. We put these in our door and have been quite happy with the location.
Charging sources. All of your charging sources (alternator, solar, shore) need to run to the electrical box. Find where your car’s alternator is, probably near the front driver’s seat. You’ll need to run a wire from there to your B2B charger in the electrical box. Solar will need to come down from the roof somewhere. You should put your shore power hookup on the same side as the electrical box.
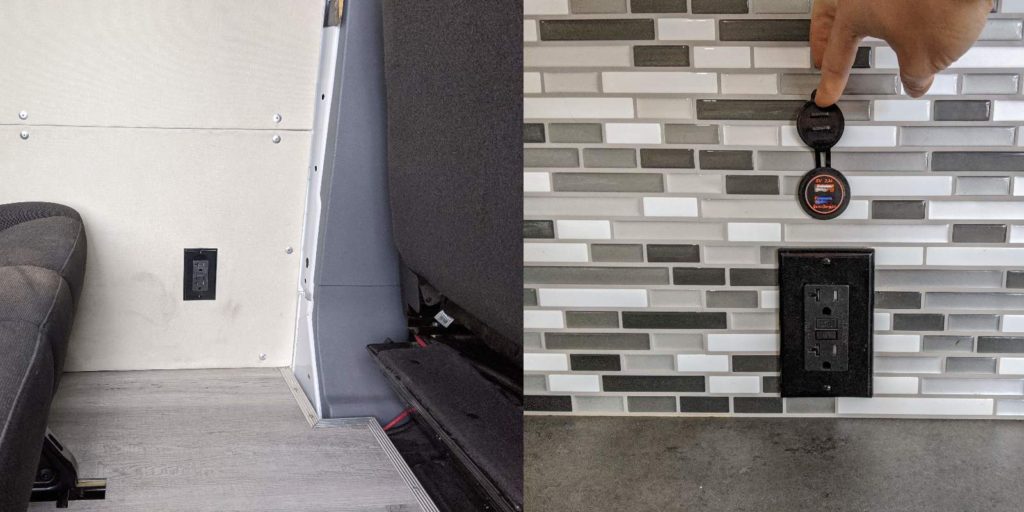
Loads. Finally, map where your loads are going to be, like refrigerator, AC outlets, DC or USB outlets, water pump, water heater, overhead lights. The distance of these locations from your electrical box (where the buses are) will determine the size wire you’ll need.
Wires
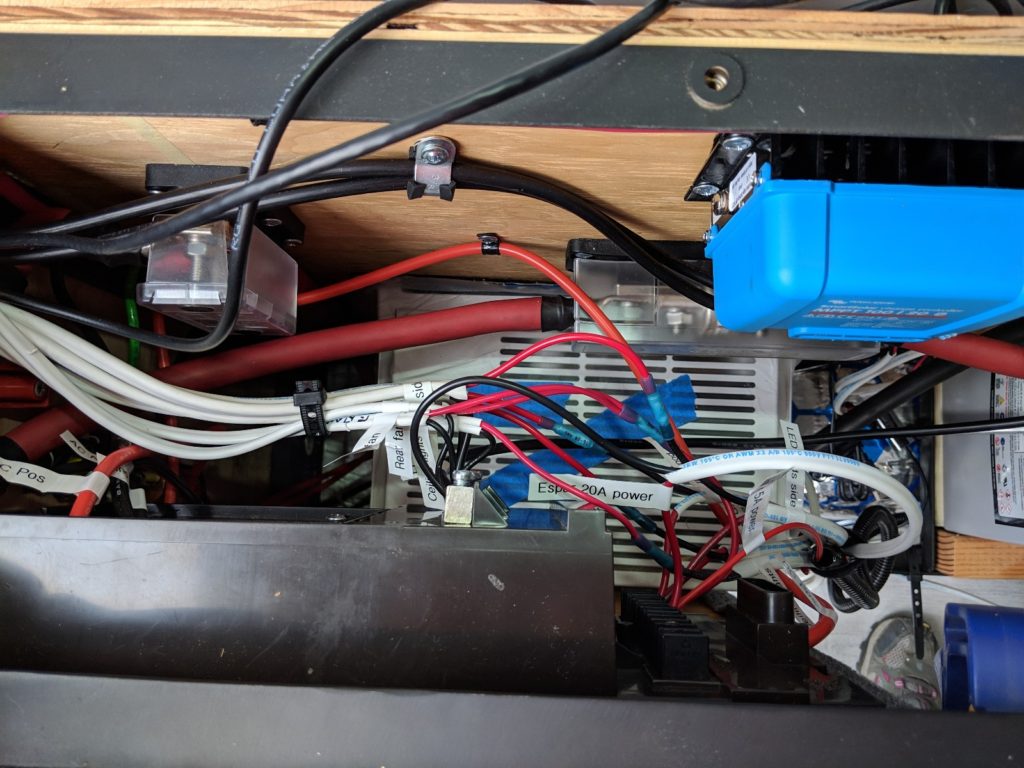
An inch on paper can be 15ft of wire in a van. You want to size your wire gauges appropriately: you want sufficiently-sized wires to carry large loads (e.g. from the alternator), but not over-design (for size and cost; 4/0 AWG wire is 0.5″ thick!).
To determine what AWG wire size for each segment of your system, look at each of your major system components’ spec sheets. Some will actually state the recommended wire gauge and fuse size. For example, the Magnum MSH3012 3000W Inverter states 4/0 AWG wire and 400A fuse. Listen to them. Don’t skimp.
If the components don’t directly state the wire gauge, find their max input and max output currents; for the wire connecting the output of one component to the input of the other, take the larger of the two. The voltage will be either 12V for DC or 110V for AC. Then use the Blue Seas calculator to find what size wire.
Don’t skimp on the wire sizes to save money; you’re going to be transporting a lot of juice and you want to ensure your system can handle the load. For each electrical run, you’ll need wire, lugs for the ends, and heat shrink.
Wire
We found most of our wires and lugs on Amazon. A full list of our parts can be found in the parts directory. Order more wire length than you’ll need. You’ll make mistakes. It’ll also take more wire than you think to twist and turn to get the terminals lined up correctly, especially with thicker wires.


To crimp lugs on the ends of wires:
- Strip the end of the wire using a wire stripper or Exacto to a little less than the length of the lug shaft. You don’t want bare metal showing.
- Twist the copper wire strands so they stay together.
- Put ~2″ length strip of heatshield on the end of the wire. It won’t fit after you put the lug on.
- Crimp the lug. We managed to do all ours without a special crimping tool; you can use heavy pliers for the smaller-diameter wires. The 4/0AWG wires required a large ball bearing in a vice.
- Use a small hand torch to shrink the heatshrink over the interface of the wire and lug.
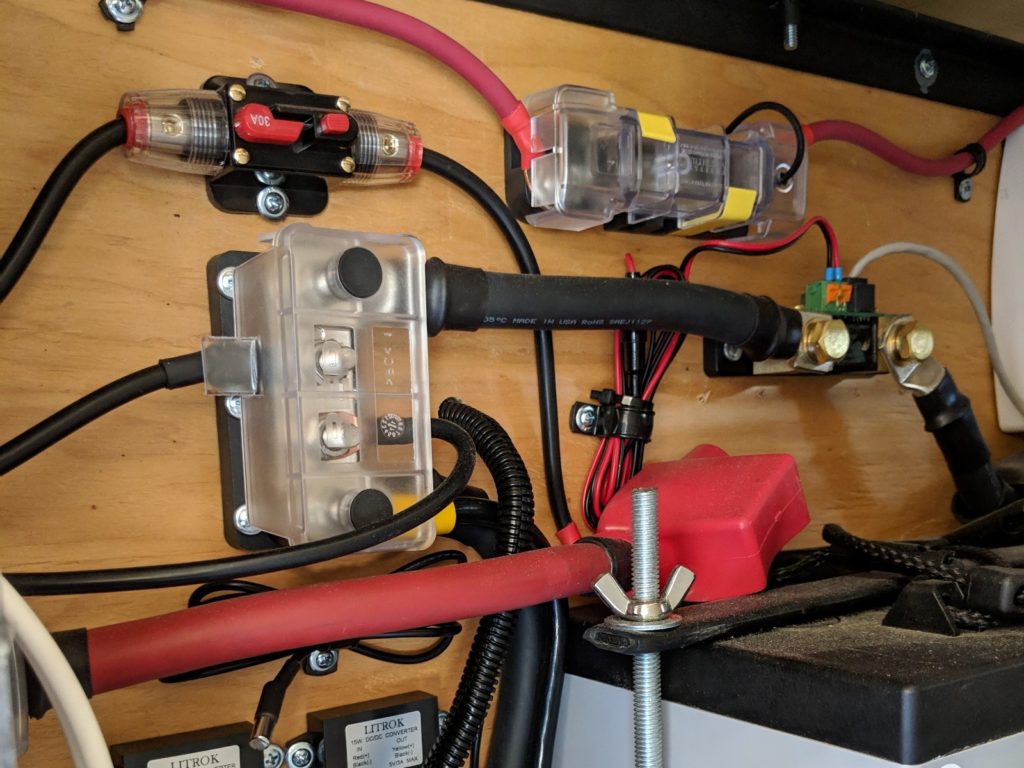
Fuses
Don’t skimp on wire sizes and don’t skimp on fuses. You’ve got a lot of expensive equipment ($1800 inverter), not to mention a van full of electronics with long wire runs. You want to fuse as close to the output of components as possible to protect the long wire run after that. For example, the Transit’s alternator is located at the driver’s front seat; put a fuse there before the 10ft run to the back of the van where your electrical box is likely to be. In DC circuits, you need really only fuse positive side since negative is ground.
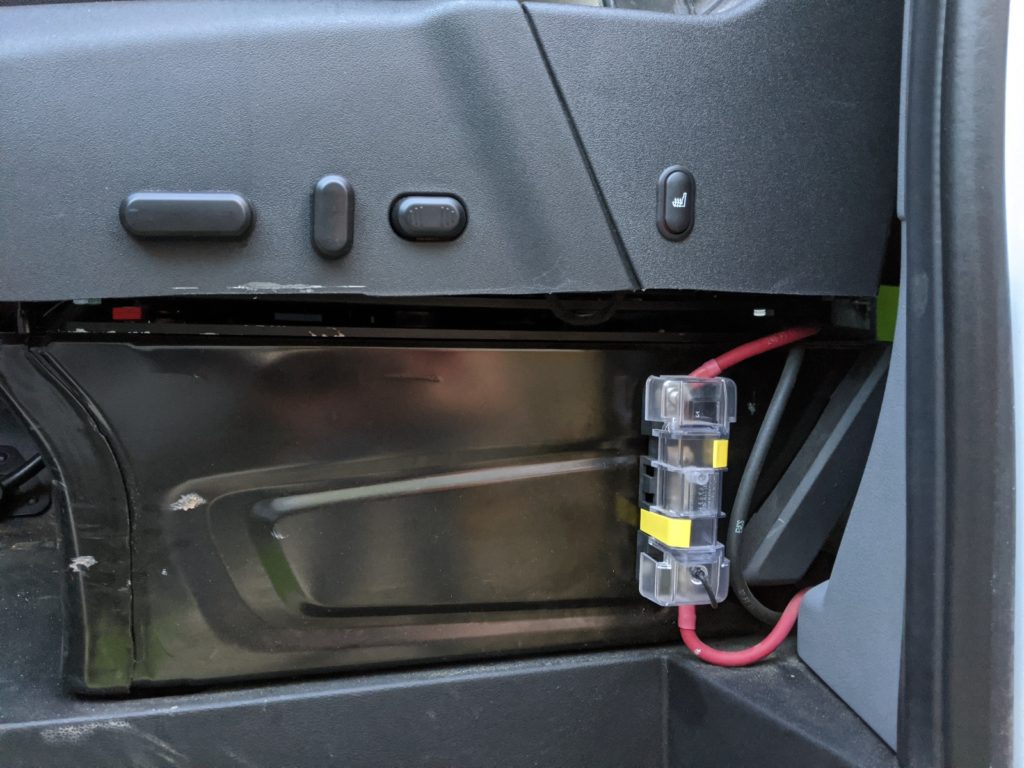

Blue Sea Systems Safety Fuse Block
This is one example of the fuse holder; you can find the whole list in the parts directory.

Solar and Roof
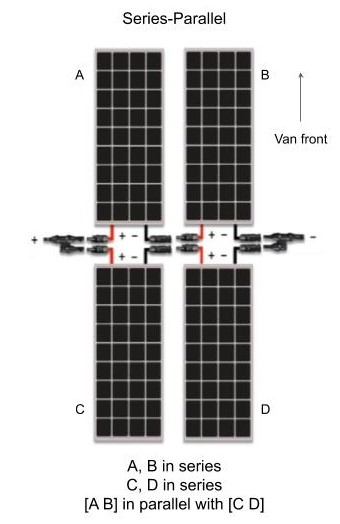
We have our solar panels in series-parallel. We chose which panels to put in series based on the ease of where the terminals were on the panels.
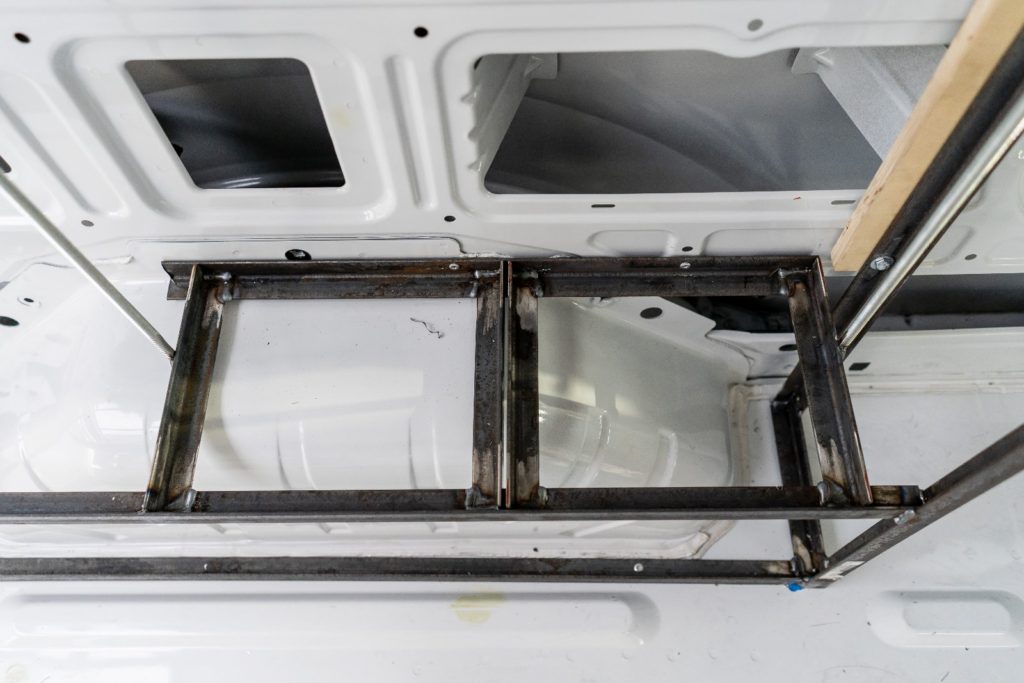
All our electronics routed through an electrical box on the roof. There’s one hole for all the cables through our roof in the rear.
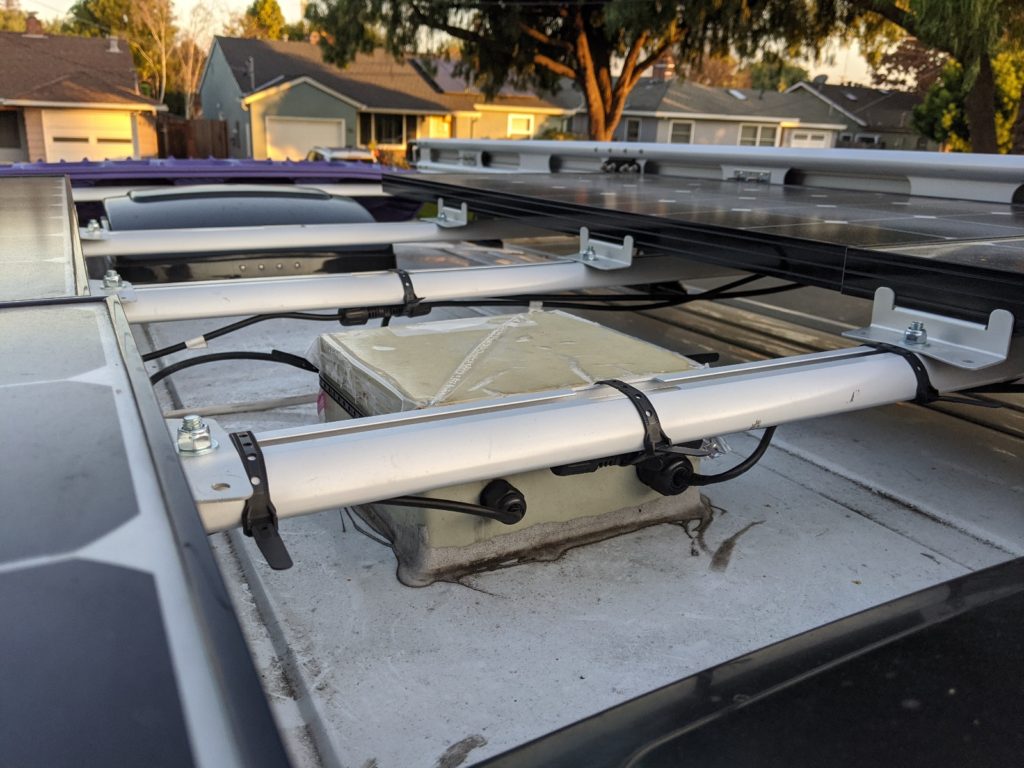
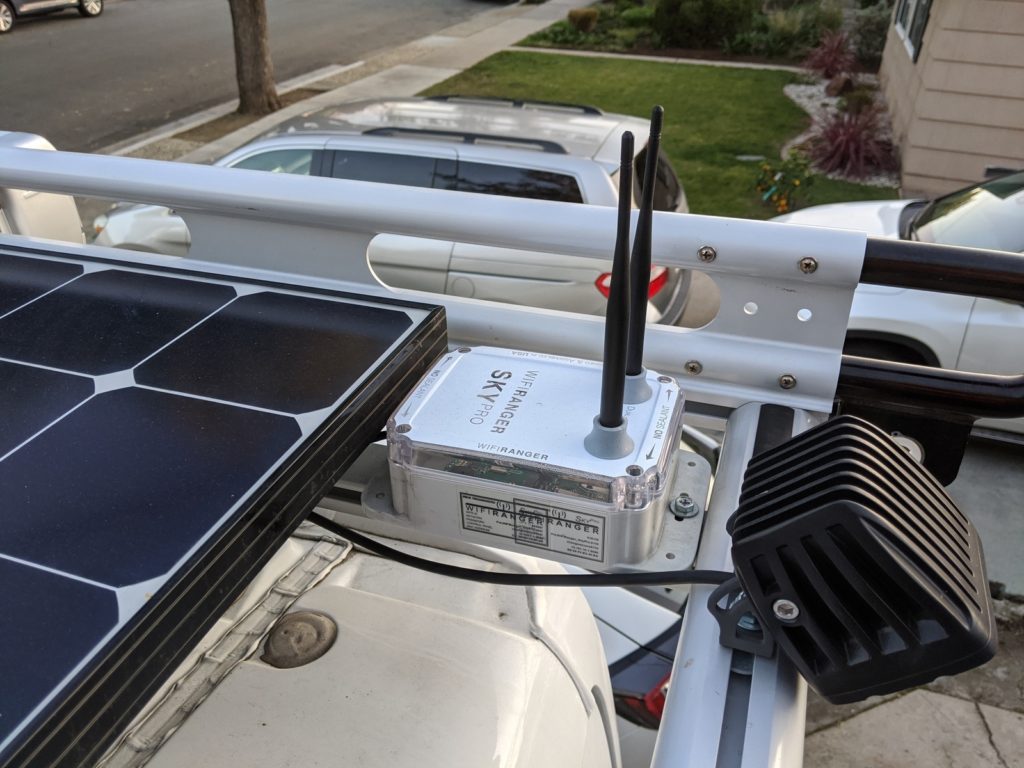
All of our equipment like the cell booster, wifi broadcaster, and LED lights run through across the roof rack bars to the electrical box.

To secure the electrical box to the roof, use 3M Windo-Weld between the van and the bottom edge of the box. Then waterproof and seal on top with Self-Leveling Dicor. (This is the same way you attach and seal the roof fans.)


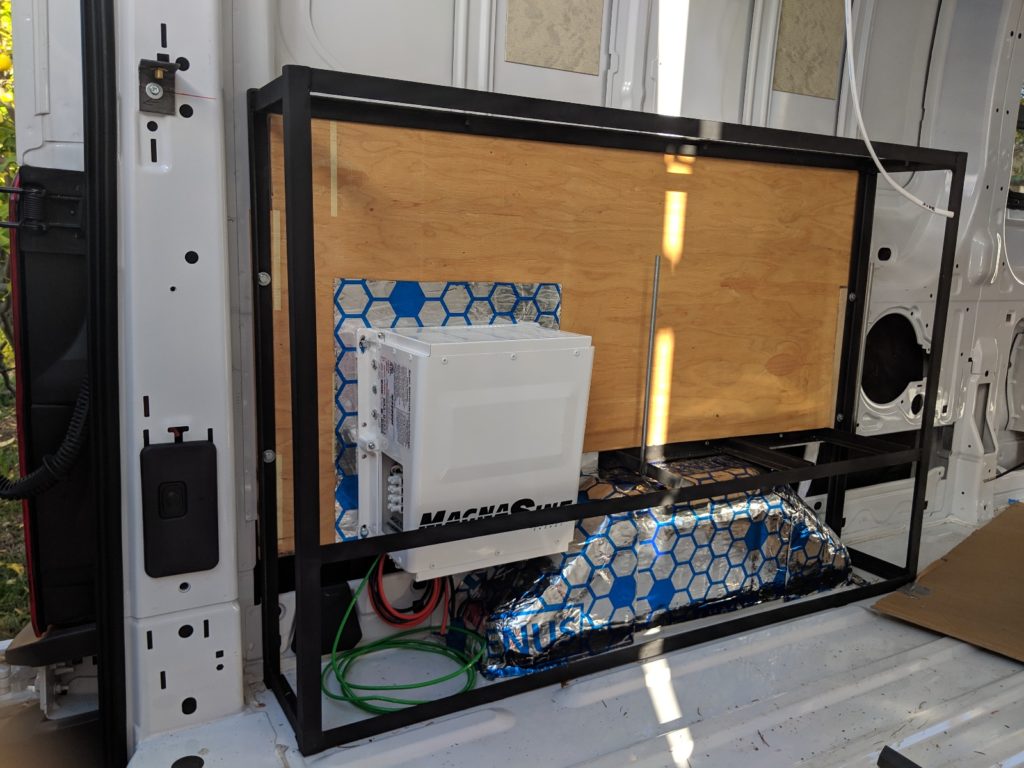
Assembling the Electrical Cabinet
At this point, it’s plug-and-play according to your logical and physical electrical diagrams.


Venting the Cabinet
Make sure you don’t place your components too close in the cabinet; there’s a lot of heat generated and you’ll need to actively vent the cabinet. It’s really no different than a desktop computer.
We have a 6″ computer fan hooked up to a thermostat that automatically kicks on at a specified temperature, actively blowing air out. On the other side of the cabinet, you need to put a vent to allow air in and across the electronics. If your bedframe rests on top of the electrical cabinet with crossmember supports, you’ll already have air gaps at the top.


Grounding
For the main ground connector, we used a simple connector and placed it below the inverter/charger, directly against the van (labeled T in one of the photos above). It’s right next to the existing van ground, that we found in the Ford Transit BEMM (Body and Equipment Mounting Manual).

That’s it for the physical build. Once you have it all laid out, it’s then just wire stripping, wire connecting, and keeping track of what you’ve wired. Next up is the final part of the van electrical series, control and monitoring.
→ Explore more articles in Camper Van